OpenCode
一、OpenCode
1.1 安装OpenCode
OpenCode安装超级简单,一行命令搞定。
打开终端,运行这个安装脚本:
1 | |

如果有更新,会进行更新如图所示。
1.2 Commands
用!开头来使用shell命令
1 | |
| command | 作用 |
|---|---|
/agent |
切换build和plan模式,可以直接使用TAB
切换 |
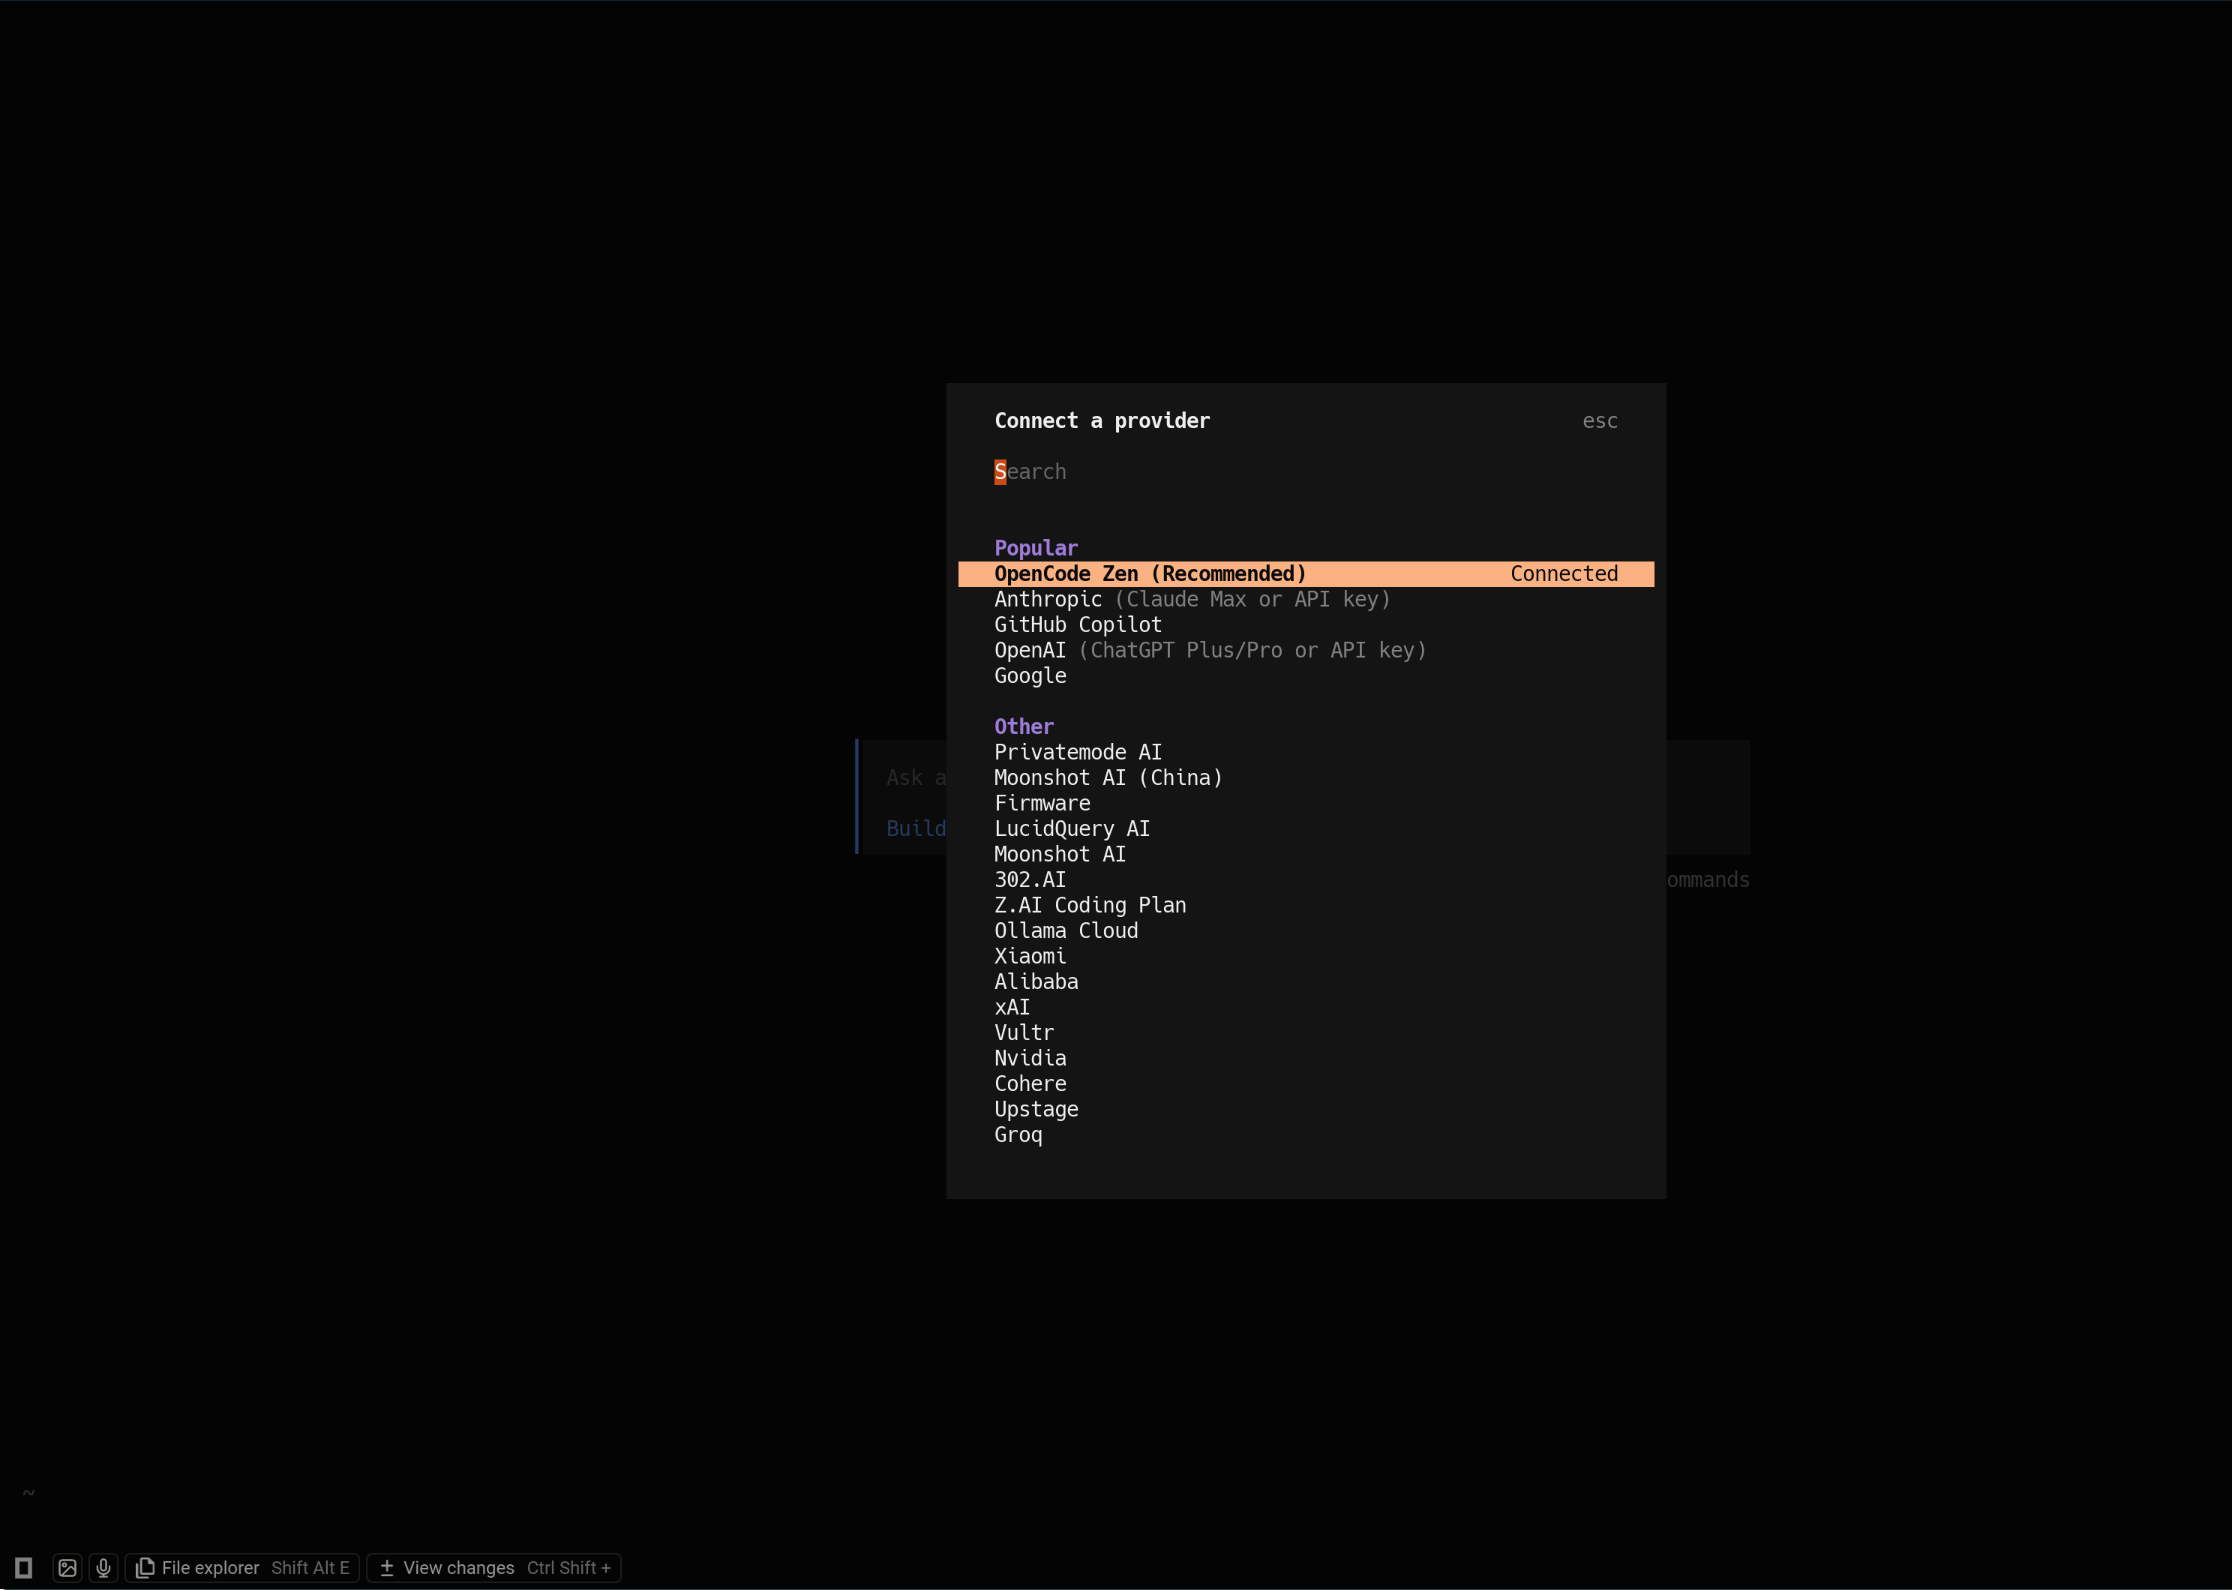
/connect |
配置模型 |
/compact |
压缩当前会话 |
/copy |
复制session记录 |
/details |
切换工具执行详情 |
/editor |
打开编辑器 |
/exit |
退出 |
/export |
将当前对话导出为 Markdown 格式并在默认编辑器中打开。 |
/fork |
fork from message |
/init |
创建或更新 AGENTS.md 文件 |
/mcp |
切换 MCP |
/models |
列出可用模型 |
/new |
开始新会话 |
/rename |
重命名会话 |
/review |
review changes |
/redo |
重做之前撤销的消息。仅在使用 /undo 后可用。(内部使用 Git 来管理文件变更。因此,您的项目需要是一个 Git 仓库。) |
/sessions |
列出并切换会话 |
/share |
分享当前会话 |
/status |
查看状态 |
/theme |
列出可用主题 |
/thinking |
在对话中切换显示思考/推理块的可见性。 |
/timeline |
Jump to message |
/timestamps |
时间戳 |
/undo |
撤销对话中的上一条消息。删除最近用户发送的消息、所有后续回复以及任何文件更改。 |
/unshare |
取消分享当前会话 |
@ |
在消息中引用文件。这会在当前工作目录中进行模糊文件搜索。 |
1.2.1 自定义Commands
- 创建.opencode/commands/test.md
1 | |
1 | |
- 在OpenCode config中使用command指令
opencode.json
1 | |
1 | |
- Template选项定义了当命令执行时将发送给 LLM 的提示。
- description 选项提供命令执行功能的简要描述。
- agent 配置可选指定哪个agents应执行此命令。如果这是一个子agents,命令将默认触发子agents调用。要禁用此行为,将 subtask 设置为 false 。
- subtask 布尔值强制命令触发子agents调用。如果希望命令不污染你的主上下文,这很有用,并且会强制agents作为子agents行动,即使agents配置中的 mode 设置为 primary 。
- model 配置来覆盖此命令的默认模型。
- 使用参数运行命令
.opencode/commands/create-file.md
1 | |
1 | |
- 文件引用
使用 @后跟文件名在命令中包含文件。
.opencode/commands/review-component.md
1 | |
文件内容会自动包含在提示中。
1.3 配置OpenCode
配置主要是设置AI模型的API密钥,让OpenCode能调用AI。
- 运行OpenCode:
1 | |
这会打开一个终端界面(TUI,像聊天窗口)。
在界面里输入命令
/connect,选择提供商(如opencode、anthropic、openai、google、DeepSeek、Qwen、Minimax、Moonshot、Z.AI)。选择不同的提供商,输入对应的API密钥就可以了。
高级配置:编辑配置文件~/.config/opencode/opencode.json。比如添加主题或键位。
opencode配置优先级顺序:
- 远程配置:.well-known/opencode(organizational defaults)
- 全局配置:~/.config/opencode/opencode.json(user preferences)
- 自定义配置:OPENCODE_CONFIG环境变量(自定义覆盖)
- 项目配置:opencode.json在项目中(项目特定设置)
- .opencode目录- agents, commands, plugins
- 内联配置: OPENCODE_CONFIG_CONTENT环境变量(运行时覆盖)
这意味着项目配置可以覆盖全局默认值,全局配置可以覆盖远程组织默认值。
.opencode 和 ~/.config/opencode 目录使用复数名称作为子目录:** agents/ 、 commands/ 、 modes/ 、 plugins/ 、 skills/ 、 tools/ 和 themes/** 。为了向后兼容,也支持单数名称(例如 agent/ )。
1.3.1 Rules
为 opencode 设置自定义指令。要创建一个新的 AGENTS.md 文件,您可以在
opencode 中运行 /init命令。
优先级
- 从当前目录向上遍历本地文件( AGENTS.md , CLAUDE.md )
- 全局文件位于
~/.config/opencode/AGENTS.md - Claude Code文件位于
~/.claude/CLAUDE.md(除非禁用)
每个类别中,第一个匹配的文件胜出。例如,如果你同时有 AGENTS.md 和
CLAUDE.md ,则仅使用 AGENTS.md 。类似地,
~/.config/opencode/AGENTS.md 优先于
~/.claude/CLAUDE.md 。
要禁用 Claude Code 兼容性,请设置以下环境变量之一:
1 | |
自定义指令
可以在 opencode.json 或全局 ~/.config/opencode/opencode.json 中指定自定义指令文件。这允许您和您的团队重用现有规则,而不是将它们复制到 AGENTS.md。
1 | |
您还可以使用远程 URL 从网络上加载指令。
1 | |
远程指令获取时设有 5 秒超时。所有指令文件将与您的 AGENTS.md 文件合并。
您可以通过在您的 AGENTS.md 中提供明确指令来教会 opencode 读取外部文件。以下是一个实际示例:
1 | |
这种做法可以让你:
- 创建模块化、可重用的规则文件
- 通过符号链接或 git 子模块在项目间共享规则
- 保持 AGENTS.md 简洁,同时参考详细指南
- 确保 opencode 仅在特定任务需要时加载文件
1.3.2 Agents
Agents是可配置用于特定任务和工作流程的专业 AI 助手。它们允许你使用自定义提示、模型和工具访问创建专注的工具。
你可以在会话期间切换agents,或使用 @ 提及调用它们。
OpenCode 中有两种类型的agents:
主agents:你直接交互的主要助手。你可以使用 Tab 键或你配置的 switch_agent 快捷键在它们之间切换。这些agents处理你的主要对话。OpenCode 内置两个主agents:
- Build:构建是默认的主agents,所有工具都已启用。这是开发工作的标准agents,您需要完全访问文件操作和系统命令。
- Plan:一个用于规划和分析的受限agents。我们使用权限系统来给你更多控制权,并防止无意中的更改。默认情况下,以下所有设置都为
ask:- file edits:所有写入、补丁和编辑
- bash: 所有 bash 命令
subagents:主agents可以调用的专门助手,用于特定任务。你也可以通过在消息中@提及它们来手动调用它们。OpenCode 内置两个主subagents:
- General:一个通用的agents,用于研究复杂问题并执行多步任务。具有完整的工具访问权限(除 todo 外),因此可以在需要时进行文件修改。使用此agents可以并行运行多个工作单元。
- Explore:一个快速、只读的agents,用于探索代码库。不能修改文件。当你需要快速通过模式查找文件、搜索代码中的关键词,或回答关于代码库的问题时使用。
由主agents根据其描述自动调用以执行特定任务。通过在消息中提及子agents手动调用。例如。
1
@general help me search for this function配置
在您的 opencode.json 配置文件中配置agents:
1 | |
您也可以使用 markdown 文件定义agents。将它们放置在:
- 全局:
~/.config/opencode/agents/ - 项目级别:
.opencode/agents/
1 | |
Markdown 文件名成为agents名称。例如, review.md 创建一个 review agents。
1 | |
description:选项来简要描述agents的作用以及何时使用它。
temperature:配置控制 LLM 的响应随机性和创造性。
- 0.0-0.2:非常专注和确定的响应,适合代码分析和规划
- 0.3-0.5:平衡的响应,带有一些创造性,适合一般开发任务
- 0.6-1.0:更具创意和多样化的回复,适用于头脑风暴和探索
maxSteps:控制智能体在被迫仅以文本形式响应之前可以执行的最大迭代次数。这允许希望控制成本的用户对智能体行为设置限制。如果未设置此值,智能体将继续迭代,直到模型选择停止或用户中断会话。当达到限制时,智能体会收到一个特殊的系统提示,指示其以对其工作的总结和推荐剩余任务的形式进行响应。
disable:设置为 true 以禁用agents。
prompt:使用 prompt 配置为该agents指定一个自定义系统提示文件。提示文件应包含特定于agents用途的说明。这个路径是相对于配置文件所在的位置。因此,它适用于全局 OpenCode 配置和特定项目的配置。
model:使用 model 配置来覆盖此agents的模型。这对于使用针对不同任务优化的不同模型很有用。
tools:通过 tools 配置控制此agents中可用的工具。你可以通过将其设置为 true 或 false 来启用或禁用特定工具。您还可以使用通配符来同时控制多个工具。
permission:您可以通过配置权限来管理agents可以执行的操作。目前, edit 、 bash 和 webfetch 工具的权限可以配置为:
- “ask” — 运行工具前需要请求批准
- “allow” — 允许所有操作无需批准
- “deny” — 禁用该工具
你也可以在 Markdown agents中设置权限。
1
2
3
4
5
6
7
8
9
10
11
12
13
14---
description: Code review without edits
mode: subagent
permission:
edit: deny
bash:
"*": ask
"git diff": allow
"git log*": allow
"grep *": allow
webfetch: deny
---
Only analyze code and suggest changes.mode: mode 选项用于确定agents的使用方式
hidden:true 将子agents从
@自动补全菜单中隐藏。适用于仅应通过任务工具由其他agents程序化调用的内subagents。
创建Agents
1 | |
- 询问应将agents保存到哪里;全局还是特定项目。
- agents应执行的操作说明。
- 生成合适的系统提示和标识符。
- 让您选择agents可以访问哪些工具。
- 最后,创建一个包含agents配置的 markdown 文件。
1.3.3 Models
要将这些模型中的一个设置为默认模型,你可以在你的 OpenCode 配置中设置 model。
1 | |
您可以通过配置文件全局配置模型的选项。
1 | |
您也可以定义自定义变体来扩展内置变体。变体允许您为同一模型配置不同的设置,而无需创建重复条目:
1 | |
Anthropic:
- high - High thinking budget (default)
- max - Maximum thinking budget
OpenAI:
因模型而异,大致为:
- none - No reasoning
- minimal - Minimal reasoning effort
- low - Low reasoning effort
- medium - Medium reasoning effort
- high - High reasoning effort
- xhigh - Extra high reasoning effort
Google:
- low - Lower effort/token budget
- high - Higher effort/token budget
自定义变体
您可以覆盖现有变体或添加自己的:
1 | |
1.3.4 Formatters
OpenCode 在使用语言特定的格式化工具编写或编辑文件后自动格式化文件。这确保了生成的代码符合您项目的代码风格。
| Formatter | Extensions | Requirements |
|---|---|---|
| gofmt | .go | gofmt command available |
| mix | .ex, .exs, .eex, .heex, .leex, .neex, .sface | mix command available |
| prettier | .js, .jsx, .ts, .tsx, .html, .css, .md, .json, .yaml, and more | prettier dependency in package.json |
| biome | .js, .jsx, .ts, .tsx, .html, .css, .md, .json, .yaml, and more | biome.json(c) config file |
| zig | .zig, .zon | zig command available |
| clang-format | .c, .cpp, .h, .hpp, .ino, and more | .clang-format config file |
| ktlint | .kt, .kts | ktlint command available |
| ruff | .py, .pyi | ruff command available with config |
| rustfmt | .rs | rustfmt command available |
| cargofmt | .rs | cargo fmt command available |
| uv | .py, .pyi | uv command available |
| rubocop | .rb, .rake, .gemspec, .ru | rubocop command available |
| standardrb | .rb, .rake, .gemspec, .ru | standardrb command available |
| htmlbeautifier | .erb, .html.erb | htmlbeautifier command available |
| air | .R | air command available |
| dart | .dart | dart command available |
| ocamlformat | .ml, .mli | ocamlformat command available and
.ocamlformat config file |
| terraform | .tf, .tfvars | terraform command available |
| gleam | .gleam | gleam command available |
| nixfmt | .nix | nixfmt command available |
| shfmt | .sh, .bash | shfmt command available |
| pint | .php | laravel/pint dependency in
composer.json |
| oxfmt (Experimental) | .js, .jsx, .ts, .tsx | oxfmt dependency in package.json and an experimental env
variable flag |
当 OpenCode 写入或编辑文件时,它会:
- 检查文件扩展名与所有启用的格式化器是否匹配。
- 在文件上运行适当的格式化器命令。
- 自动应用格式更改。
您可以通过 OpenCode 配置中的 formatter 部分自定义格式器。
1 | |
- disabled:布尔值,将此设置为 true 以禁用格式化器
- command: string[],用于格式化的命令
- environment:object,运行格式化器时需要设置的环境变量
- extensions:string[],此格式化器应处理的文件扩展名
要全局禁用所有格式化器,将 formatter 设置为 false :
1 | |
要禁用特定格式化器,将 disabled 设置为 true :
1 | |
1.3.5 LSP Servers
OpenCode 通过语言服务器协议(LSP)帮助 LLM 与您的代码库交互。它使用诊断功能向 LLM 提供反馈。OpenCode 为流行语言提供了几个内置的 LSP 服务器:
| LSP Server | Extensions | Requirements |
|---|---|---|
| astro | .astro | Auto-installs for Astro projects |
| bash | .sh, .bash, .zsh, .ksh | Auto-installs bash-language-server |
| clangd | .c, .cpp, .cc, .cxx, .c++, .h, .hpp, .hh, .hxx, .h++ | Auto-installs for C/C++ projects |
| csharp | .cs | .NET SDK installed |
| clojure-lsp | .clj, .cljs, .cljc, .edn | clojure-lsp command available |
| dart | .dart | dart command available |
| deno | .ts, .tsx, .js, .jsx, .mjs | deno command available (auto-detects
deno.json/deno.jsonc) |
| elixir-ls | .ex, .exs | elixir command available |
| eslint | .ts, .tsx, .js, .jsx, .mjs, .cjs, .mts, .cts, .vue | eslint dependency in project |
| fsharp | .fs, .fsi, .fsx, .fsscript | .NET SDK installed |
| gleam | .gleam | gleam command available |
| gopls | .go | go command available |
| jdtls | .java | Java SDK (version 21+) installed |
| kotlin-ls | .kt, .kts | Auto-installs for Kotlin projects |
| lua-ls | .lua | Auto-installs for Lua projects |
| nixd | .nix | nixd command available |
| ocaml-lsp | .ml, .mli | ocamllsp command available |
| oxlint | .ts, .tsx, .js, .jsx, .mjs, .cjs, .mts, .cts, .vue, .astro, .svelte | oxlint dependency in project |
| php intelephense | .php | Auto-installs for PHP projects |
| prisma | .prisma | prisma command available |
| pyright | .py, .pyi | pyright dependency installed |
| ruby-lsp (rubocop) | .rb, .rake, .gemspec, .ru | ruby and gem commands available |
| rust | .rs | rust-analyzer command available |
| sourcekit-lsp | .swift, .objc, .objcpp | swift installed (xcode on macOS) |
| svelte | .svelte | Auto-installs for Svelte projects |
| terraform | .tf, .tfvars | Auto-installs from GitHub releases |
| tinymist | .typ, .typc | Auto-installs from GitHub releases |
| typescript | .ts, .tsx, .js, .jsx, .mjs, .cjs, .mts, .cts | typescript dependency in project |
| vue | .vue | Auto-installs for Vue projects |
| yaml-ls | .yaml, .yml | Auto-installs Red Hat yaml-language-server |
| zls | .zig, .zon | zig command available |
当检测到上述文件扩展名之一且满足要求时,LSP 服务器将自动启用。当 opencode 打开文件时,它会:
- 检查文件扩展名与所有启用的 LSP 服务器是否匹配。
- 如果 LSP 服务器尚未运行,则启动相应的 LSP 服务器。
配置
您可以通过 opencode 配置中的 lsp 部分自定义 LSP 服务器。
Each LSP server supports the following:
| Property | Type | Description |
|---|---|---|
disabled |
boolean | 将此设置为 true 以禁用 LSP 服务器 |
command |
string[] | 启动 LSP 服务器的命令 |
extensions |
string[] | 此 LSP 服务器应处理的文件扩展名 |
env |
object | 启动服务器时需要设置的环境变量 |
initialization |
object | 发送给 LSP 服务器的初始化选项 |
要禁用特定的 LSP 服务器,将 disabled 设置为 true,您可以通过指定命令和文件扩展名来添加自定义 LSP 服务器:
1 | |
要全局禁用所有 LSP 服务器,将 lsp 设置为 false :
1 | |
1.3.6 MCP servers
您可以在 OpenCode 配置文件中的 mcp 下定义 MCP 服务器。为每个 MCP 添加一个唯一名称。在提示 LLM 时,您可以通过名称引用该 MCP。
1 | |
覆盖远程默认设置
组织可以通过它们的 .well-known/opencode 端点提供默认的 MCP 服务器。这些服务器默认可能是禁用的,允许用户选择他们需要的那些服务器。
要从您组织的远程配置中启用特定服务器,请使用 enabled: true 将其添加到本地配置中。
1 | |
本地
在 MCP 对象中使用 type 到 “local” 添加本地 MCP 服务器。
1 | |
| Option | Type | Required | Description |
|---|---|---|---|
type |
String | Y | MCP 服务器连接类型,必须是 "local"
或"remote". |
command |
String | Y(local) | 运行 MCP 服务器的命令和参数。 |
url |
String | Y(remote) | 远程 MCP 服务器的 URL。 |
environment |
Object | local | 运行服务器时需要设置的环境变量。 |
enabled |
Boolean | 在启动时启用或禁用 MCP 服务器。 | |
headers |
Object | remote | 随请求发送的标头。 |
oauth |
Object | remote | OAuth 认证配置。 |
timeout |
Number | 从 MCP 服务器获取工具的超时时间(毫秒)。默认为 5000(5 秒)。 |
如果您有来自 MCP 服务器的客户端凭证,可以配置它们:
1 | |
如果您已注册免费账户,您可以使用您的 API 密钥并获取更高的速率限制。
1
2
3
4
5
6
7
8
9
10
11
12{
"$schema": "https://opencode.ai/config.json",
"mcp": {
"context7": {
"type": "remote",
"url": "https://mcp.context7.com/mcp",
"headers": {
"CONTEXT7_API_KEY": "{env:CONTEXT7_API_KEY}"
}
}
}
}
OAuth 选项
| Option | 类型 | 描述 |
|---|---|---|
oauth |
Object or false | OAuth 配置对象,或 false 禁用 OAuth 自动检测。 |
clientId |
String | OAuth 客户端 ID。如果未提供,将尝试动态客户端注册。 |
clientSecret |
String | OAuth 客户端密钥,如果授权服务器需要。 |
scope |
String | OAuth 范围在授权期间请求。 |
如果你有大量的 MCP 服务器,你可能只想按agents启用它们,并在全局中禁用它们。要这样做:
- 作为工具在全局中禁用它。
- 在你的agents配置中,将 MCP 服务器作为一个工具启用。
1 | |
1.3.7 ACP Support
OpenCode 支持 Agent Client Protocol(ACP),允许您直接在兼容的编辑器和 IDE 中使用它。
Zed
添加到你Zed配置 ( ~/.config/zed/settings.json ):
1 | |
要打开它,请在命令面板中使用 agent: new thread 操作。
您也可以通过编辑您的 keymap.json :
1 | |
JetBrains IDEs
~/.jetbrains/acp.json
1 | |
要打开它,请在 AI 聊天agents选择器中使用新的“OpenCode”agents。
1.3.8 Agent Skills
通过 SKILL.md 定义可重用行为。agentsskil让 OpenCode 从你的仓库或主目录中发现可重用指令。skil通过原生 skill 工具按需加载——agents可以看到可用的skil,并在需要时加载完整内容。
- 项目配置:
.opencode/skills/<name>/SKILL.md - 全局配置:
~/.config/opencode/skills/<name>/SKILL.md - 项目 Claude 兼容:
.claude/skills/<name>/SKILL.md - 全局 Claude 兼容:
~/.claude/skills/<name>/SKILL.md
对于项目本地路径,OpenCode 会从你的当前工作目录向上遍历,直到到达 git
工作树。它会加载 .opencode/ 中任何匹配的
skills/*/SKILL.md 以及沿途任何匹配的
.claude/skills/*/SKILL.md 。
全局定义也会从 ~/.config/opencode/skills/*/SKILL.md 和
~/.claude/skills/*/SKILL.md 中加载。
编写格式
name(必需):长度为 1-64 个字符,为小写字母数字,使用单个连字符分隔,不要以 - 开头或结尾,不要包含连续的 –,匹配包含 SKILL.md 的目录名。等价正则表达式:1
^[a-z0-9]+(-[a-z0-9]+)*$description(必需):必须为 1-1024 个字符。确保它足够具体,以便agent能够正确选择。license(可选)compatibility(可选)metadata(可选, string-to-string map)
未知的 frontmatter 字段会被忽略。
例子:
1 | |
识别工具描述
OpenCode 在 skill
工具描述中列出了可用skil。每个条目包括skil名称和描述:
1 | |
agent通过调用工具来加载skil:
1 | |
配置权限
使用 opencode.json
中的基于模式的权限控制agent可以访问的skil:
1 | |
| Permission | Behavior |
|---|---|
allow |
skil立即加载 |
deny |
skil对agent隐藏,访问被拒绝 |
ask |
在加载前提示用户批准 |
模式支持通配符: internal-* 匹配
internal-docs 、 internal-tools 等
为特定agent设置与全局默认值不同的权限。对于自定义agent(在agent的前置内容中):
1 | |
对于内置agent(在 opencode.json 中):
1 | |
禁用skil工具
完全禁用不应使用这些skil的agent:
对于自定义agent:
1 | |
对于内置agent:
1 | |
当禁用时, <available_skills> 部分完全被省略。
如果skil没有显示:
- 验证
SKILL.md是否全部大写 - 检查前文是否包含
name和description - 确保skil名称在所有位置都是唯一的
- 检查权限—带有
deny的skil对agent隐藏
二、Oh-My-Opencode
Oh My OpenCode(简称 OMO)是其最强插件,把单个模型升级为“多Agent协作团队”:oracle(架构师)、librarian(代码库专家)、frontend、backend 等角色并行工作,自动调度任务、深度探索代码库。
这个插件让OpenCode升级为“多AI团队”。安装基于你的订阅情况。
- 先确认你的订阅(用于配置参数):
- Claude
Pro/Max:用
--claude=yes或--claude=max20(max20是高级模式) - ChatGPT Plus:用
--openai=yes - Gemini:用
--gemini=yes - Copilot:用
--copilot=yes - 没有就用
no
- 安装Bun(如果没装,Oh My需要):
1 | |
- 安装Oh My OpenCode:
根据你的订阅替换参数。
1 | |
1 | |
如果看到插件名,就安装成功了。
Oh-My-OpenCode 提供 10 个专业的 AI Agent。每个Agent都有独特的专长、优化的模型和工具权限。
2.1 opencode-antigravity-auth
开启科学上网,并打开TUN模式。
- 在
~/.config/opencode/opencode.json文件中添加
1 | |
- 登陆Google账户
1 | |
- 验证是否成功
1 | |
正确输出就OK.
2.2 OMO详解
2.2.1 Core Agents
| Agent | Model | Purpose |
|---|---|---|
| Sisyphus | anthropic/claude-opus-4-5 |
The default orchestrator. 默认的协调器。使用专门的subAgent进行计划、分配和执行复杂任务,具有激进的多线程执行。基于待办事项的工作流程,具有扩展思考能力(32k 预算)。备用方案:kimi-k2.5 → glm-4.7 → gpt-5.2-codex → gemini-3-pro。 |
| oracle | openai/gpt-5.2 |
架构决策、代码审查、调试。仅读咨询 - 星级逻辑推理和深度分析。受 AmpCode 启发。 |
| librarian | zai-coding-plan/glm-4.7 |
多仓库分析、文档查找、开源实现示例。基于证据的答案,深入理解代码库。备用:glm-4.7-free → claude-sonnet-4-5. |
| explore | anthropic/claude-haiku-4-5 |
快速代码库探索和上下文 grep。备用:gpt-5-mini → gpt-5-nano。 |
| multimodal-looker | google/gemini-3-flash |
视觉内容专家。分析 PDF、图像、图表以提取信息。备用:gpt-5.2 → glm-4.6v → kimi-k2.5 → claude-haiku-4-5 → gpt-5-nano。 |
2.1.2 Planning Agents
| Agent | Model | Purpose |
|---|---|---|
| Prometheus | anthropic/claude-opus-4-5 |
战略规划师,具备面试模式。通过迭代提问创建详细工作计划。备用:kimi-k2.5 → gpt-5.2 → gemini-3-pro。 |
| Metis | anthropic/claude-opus-4-5 |
计划顾问 - 预规划分析。识别隐藏意图、模糊性和 AI 故障点。备用:kimi-k2.5 → gpt-5.2 → gemini-3-pro。 |
| Momus | openai/gpt-5.2 |
计划审查者 - 根据清晰度、可验证性和完整性标准对计划进行验证。备用方案:gpt-5.2 → claude-opus-4-5 → gemini-3-pro。 |
| Hephaestus | openai/gpt-5.2 |
专门写代码的模式。当你切换到这个模式,意味着需要他完成一个具体目标的任务,比如指定修改某个类的某个方法到指定内容。 |
| Atlas | anthropic/claude-sonnet-4-5 |
一个执行计划的协调者。将工作委托给专门的代理,直到完成为止。 |
Hephaestus:专门写代码的模式。当你切换到这个模式,意味着需要他完成一个具体目标的任务,比如指定修改某个类的某个方法到指定内容。他虽然也会调用Librarian或者Explore,但是主要工作是改指定代码,会快速和省钱许多。主要特点:
- 目标导向(Goal-Oriented):给他一个目标,而不是一个菜谱。他决定自己的步骤。
- 先探索再行动(Explores Before Acting):在编写一行代码之前,会启动 2-5 个并行的explore/librarian agents。
- 端到端完成(End-to-End Completion):不会停止,直到任务 100%完成并有验证证据。
- 模式匹配(Pattern Matching):搜索现有代码库以匹配你的项目风格——没有 AI 的杂乱。
- 合理的精度(Legitimate Precision):像一位大师铁匠般雕琢代码——精准、简洁、恰到好处。
Prometheus:从3.0版本开始引入的重点模式。这个模式用官方的说法是:For Precise Work。
这个模式的工作流程是:
分析提出的需求,对不清楚的地方提出一系列问题;
根据1中的结果,生成计划和和任务清单;
检查2生成的内容,拟定最后的工作计划;
等待开始工作的指令。
在这个模式下,Agent会针对需求中的模糊地带提出一系列的问题,最后得到完整的描述之后才会开始制定计划。而且Prometheus模式下Agent是只读模式的,不用担心改坏文件。那么在什么情况下使用这个模式呢:
- 涉及横跨几天或者好几个Session的任务。
- 关键性的产品变更。
- 复杂的多文件重构工作。
- 需要整个决策过程的文档的时候。
Prometheus模式的使用有一点绕。如果你还在和他交互提问或者修改方案的时候,记得手动保证当前opencode在Prometheus模式;如果要开始输入/start-work让它干活了,记得保证切换到了Sisyphus模式!虽然官方说是由Atlas负责start-work,但是在第一次开始工作时,记得用Sisyphus。
Atlas: Atlas本来是和Prometheus配套的一个模式。本来的流程中,Prometheus模式的成果是一个计划文件,Atlas会根据这个计划文件开始干活。但是在实际使用中,我们的使用流程应该是这样:Prometheus模式输出计划 -> 切换到Sisyphus输入start-work,由Sisyphus来调用Atalas。
主Agent会自动调用这些Agent,但你也可以显式调用它们:
1 | |
2.2.3 Tool Restrictions
| Agent | Restrictions |
|---|---|
| oracle | 只读:不能写入、编辑或委托 |
| librarian | 无法写入、编辑或委托 |
| explore | 无法写入、编辑或委托 |
| multimodal-looker | 仅允许:读取、glob、grep |
2.2.4 Built-in Skills
| Skill | Trigger | Description |
|---|---|---|
| playwright | 浏览器任务、测试、截图 | 通过 Playwright MCP 实现浏览器自动化。对于任何与浏览器相关的任务 - 验证、浏览、网络爬虫、测试、截图。 |
| frontend-ui-ux | UI/UX tasks, styling | 设计师转型开发者。即使没有设计原型图也能打造出色的 UI/UX。强调大胆的审美方向、独特的字体设计、协调的配色方案。 |
| git-master | commit, rebase, squash, blame | 任何 git 操作都必须使用。原子提交与自动拆分、变基/压缩工作流、历史记录搜索(追溯、二分查找、日志 -S)。 |
2.2.5 MCPs: Built-in Servers
- Exa (Web Search):由 Exa AI 驱动的实时网络搜索。
- Context7 (Official Documentation):官方文档查找任何库/框架。
- Grep.app (GitHub Code Search):超快速代码搜索公共 GitHub 仓库。非常适合查找实现示例。
2.3 ulw(UltraWork 模式)—— 日常最常用、性价比最高的开挂指令
核心机制:
在提示词中加入 ulw(或 ultrawork),OMO 会自动激活全部增强功能:
- 多Agent并行(oracle 规划 → librarian 分析现有代码 → 专业角色实现)
- 深度工具链(LSP 静态分析、AST 解析、MCP 多文件上下文)
- 子任务智能拆分与调度
- 自动验证与迭代
基础用法:
1 | |
进阶技巧:
指定优先级与角色分配
1
2ulw UI 部分优先交给视觉/交互专家,优先级最高;后端逻辑交给 backend Agent;整体架构先让 oracle 评审。
请实现一个实时仪表盘,支持 WebSocket 更新、ECharts 图表、深色模式。强制深度代码库探索
1
ulw 先全面分析整个代码库的现有模式和痛点,再重构所有 API 路由为 RESTful 标准,消除重复代码。批量清理与优化
1
ulw 移除所有 console.log、dead code、未使用 import/variables;统一代码风格(Prettier + ESLint);性能优化所有慢查询。新项目从零搭建
1
ulw 创建一个完整的 SaaS 模板:Next.js 14 App Router + Prisma + PostgreSQL + NextAuth + Tailwind + Shadcn/ui,支持多租户和订阅支付(Stripe)。结合工具链
1
ulw 先运行 npm test 收集失败案例,再针对性修复所有单元测试和集成测试,确保覆盖率 >90%。
为什么 ulw 这么强:
普通提示是单模型线性思考,容易遗漏边缘 case 或与现有代码冲突。ulw
开启多Agent并行,librarian 会持续引用项目历史,oracle
会提前识别风险,整体质量和速度提升 3-5 倍。
使用建议:
- 小任务(如改一个组件)不需要 ulw
- 中大型任务(新功能、重构、跨模块)必须加 ulw
- token 消耗会增加 2-4 倍,建议把高耗模型(如 Sonnet)留给关键Agent
2.4 ralph-loop(自主无限迭代循环)—— 追求完美时的终极武器
核心机制:
AI 会反复执行任务 → 自检 → 修复 →
再执行,直到满足完成条件或达到最大次数。适合需要“死磕到底”的场景。
触发格式:
1 | |
参数详解:
--max-iterations:安全阀,推荐 10-30--completion-promise:关键!必须是 AI 输出中能明确检测的短语
实战示例:
修复遗留 bug
1
ulw /ralph-loop "修复所有已知的生产 bug(参考 ISSUE 列表),所有测试必须通过" --max-iterations 20 --completion-promise "所有测试通过且无新错误"性能优化
1
ulw /ralph-loop "优化首页加载时间到 <1.5s(Lighthouse 分数 >95)" --max-iterations 25 --completion-promise "Lighthouse 性能分 >95"大型迁移
1
ulw /ralph-loop "将整个项目从 Redux 迁移到 Zustand,所有功能保持一致" --max-iterations 30 --completion-promise "所有 e2e 测试通过且无状态丢失"算法死磕
1
ulw /ralph-loop "实现一个 O(n log n) 的顶部 K 频繁元素算法,通过所有 leetcode 风格测试用例" --max-iterations 15 --completion-promise "所有测试用例通过"
高级玩法:
- 嵌套 ulw + ralph-loop:先 ulw 规划,再进入 ralph-loop 执行
- 中途干预:在终端看到进度不满意时 Ctrl+C 停止,调整提示后重启
- 结合实际运行:循环中让 AI 自动
/run npm run build检查是否成功
风险控制:
- 容易消耗大量 token,建议先小范围测试(max-iterations 5)
- completion-promise 要写得精准、可检测,避免无限循环
2.5 其他高级提示词技巧
直接@调用特定Agent
1
2
3@oracle 请先设计整体微服务架构图和数据库 schema
@librarian 请搜索项目中所有与支付相关的代码,总结现有逻辑和潜在风险
@frontend 请实现一个现代的响应式侧边栏,支持折叠和动态路由后台并行任务(不阻塞主对话)
1
2
ulw background: 持续监控代码库变化,自动生成更新后的架构文档
ulw background: 分析所有第三方依赖,列出过时/有安全漏洞的包并建议升级路径链式任务(分阶段)
1
2
ulw 第一阶段:只规划和输出详细实现计划(不修改代码)
ulw 第二阶段:根据计划逐步实现,每步完成后等待我确认强制思考链
在任何复杂提示前加:1
请严格遵守:1. 先全面分析现有代码 2. 输出详细计划 3. 分步执行 4. 每步完成后运行测试验证多模型协同优化
在 oh-my-opencode.json 中:- oracle 用 Claude-3.5-Sonnet(强推理)
- librarian 用 Gemini-1.5-Pro(超长上下文)
- 代码生成用 GPT-4o 或 o1(速度快)
2.6 更多高效玩法与场景
每日代码审查流程
早上输入:1
ulw 审查昨天的所有 git commit,指出潜在 bug、性能问题、风格不一致,并自动修复低风险项文档自动同步
1
ulw 每次代码变更后,自动更新 README、API 文档、架构图(用 mermaid)探索性研发
1
ulw 并行探索三种技术方案:A. 使用 tRPC B. 使用 GraphQL C. 使用 REST + Zod,请分别实现最小可运行原型并对比优劣一对多代码生成
1
ulw 为以下 10 个组件生成统一风格的实现:Button, Card, Modal, Table...与 Git 深度集成
1
ulw 根据 feat: 新增用户仪表盘 的 commit message,自动生成 PR 描述、变更日志、迁移指南
2.7 常见问题与优化建议
- 输出卡住:加“一步一步思考,出错时立即报告”或重启对话
- token 超支:优先用 Gemini 做 librarian;复杂任务分阶段执行
- Agent不听话:在提示中明确“严格按照我的指令,不得自行添加功能”
- 想加新Agent:在 oh-my-opencode.json 添加,如 “tester”:
- 保持上下文:大项目建议用
/clear前备份重要对话
掌握 ulw + ralph-loop + @Agent调用,你就真正把 OpenCode + OMO 用到了极致。很多开发者反馈:复杂功能从几天缩短到几小时,重构从一周变成一晚。