一、安装docker
1.1 安装docker
1
2
3
4
sudo pacman -S docker
1
2
sudo pacman -S libcap libelf libseccomp libtirpc go rpcsvc-proto
1.3 配置docker
1
2
sudo nvidia-ctk runtime configure --runtime=docker
nvidia-ctk命令会修改/etc/docker/daemon.json文件,以便docker可以使用NVIDIA
Container Runtime
1.4 Docker Hub 镜像加速
1 sudo vim /etc/docker/daemon.json
改成下边
1
2
3
4
5
6
7
8
9
10
11
12
13
{
重启docker
1
2
sudo systemctl daemon-reload
命令行执行
docker info,如果从结果中看到了如下内容,说明配置成功。
1
2
3
4
Registry Mirrors:
二、安装tritonserver docker镜像
拉取镜像
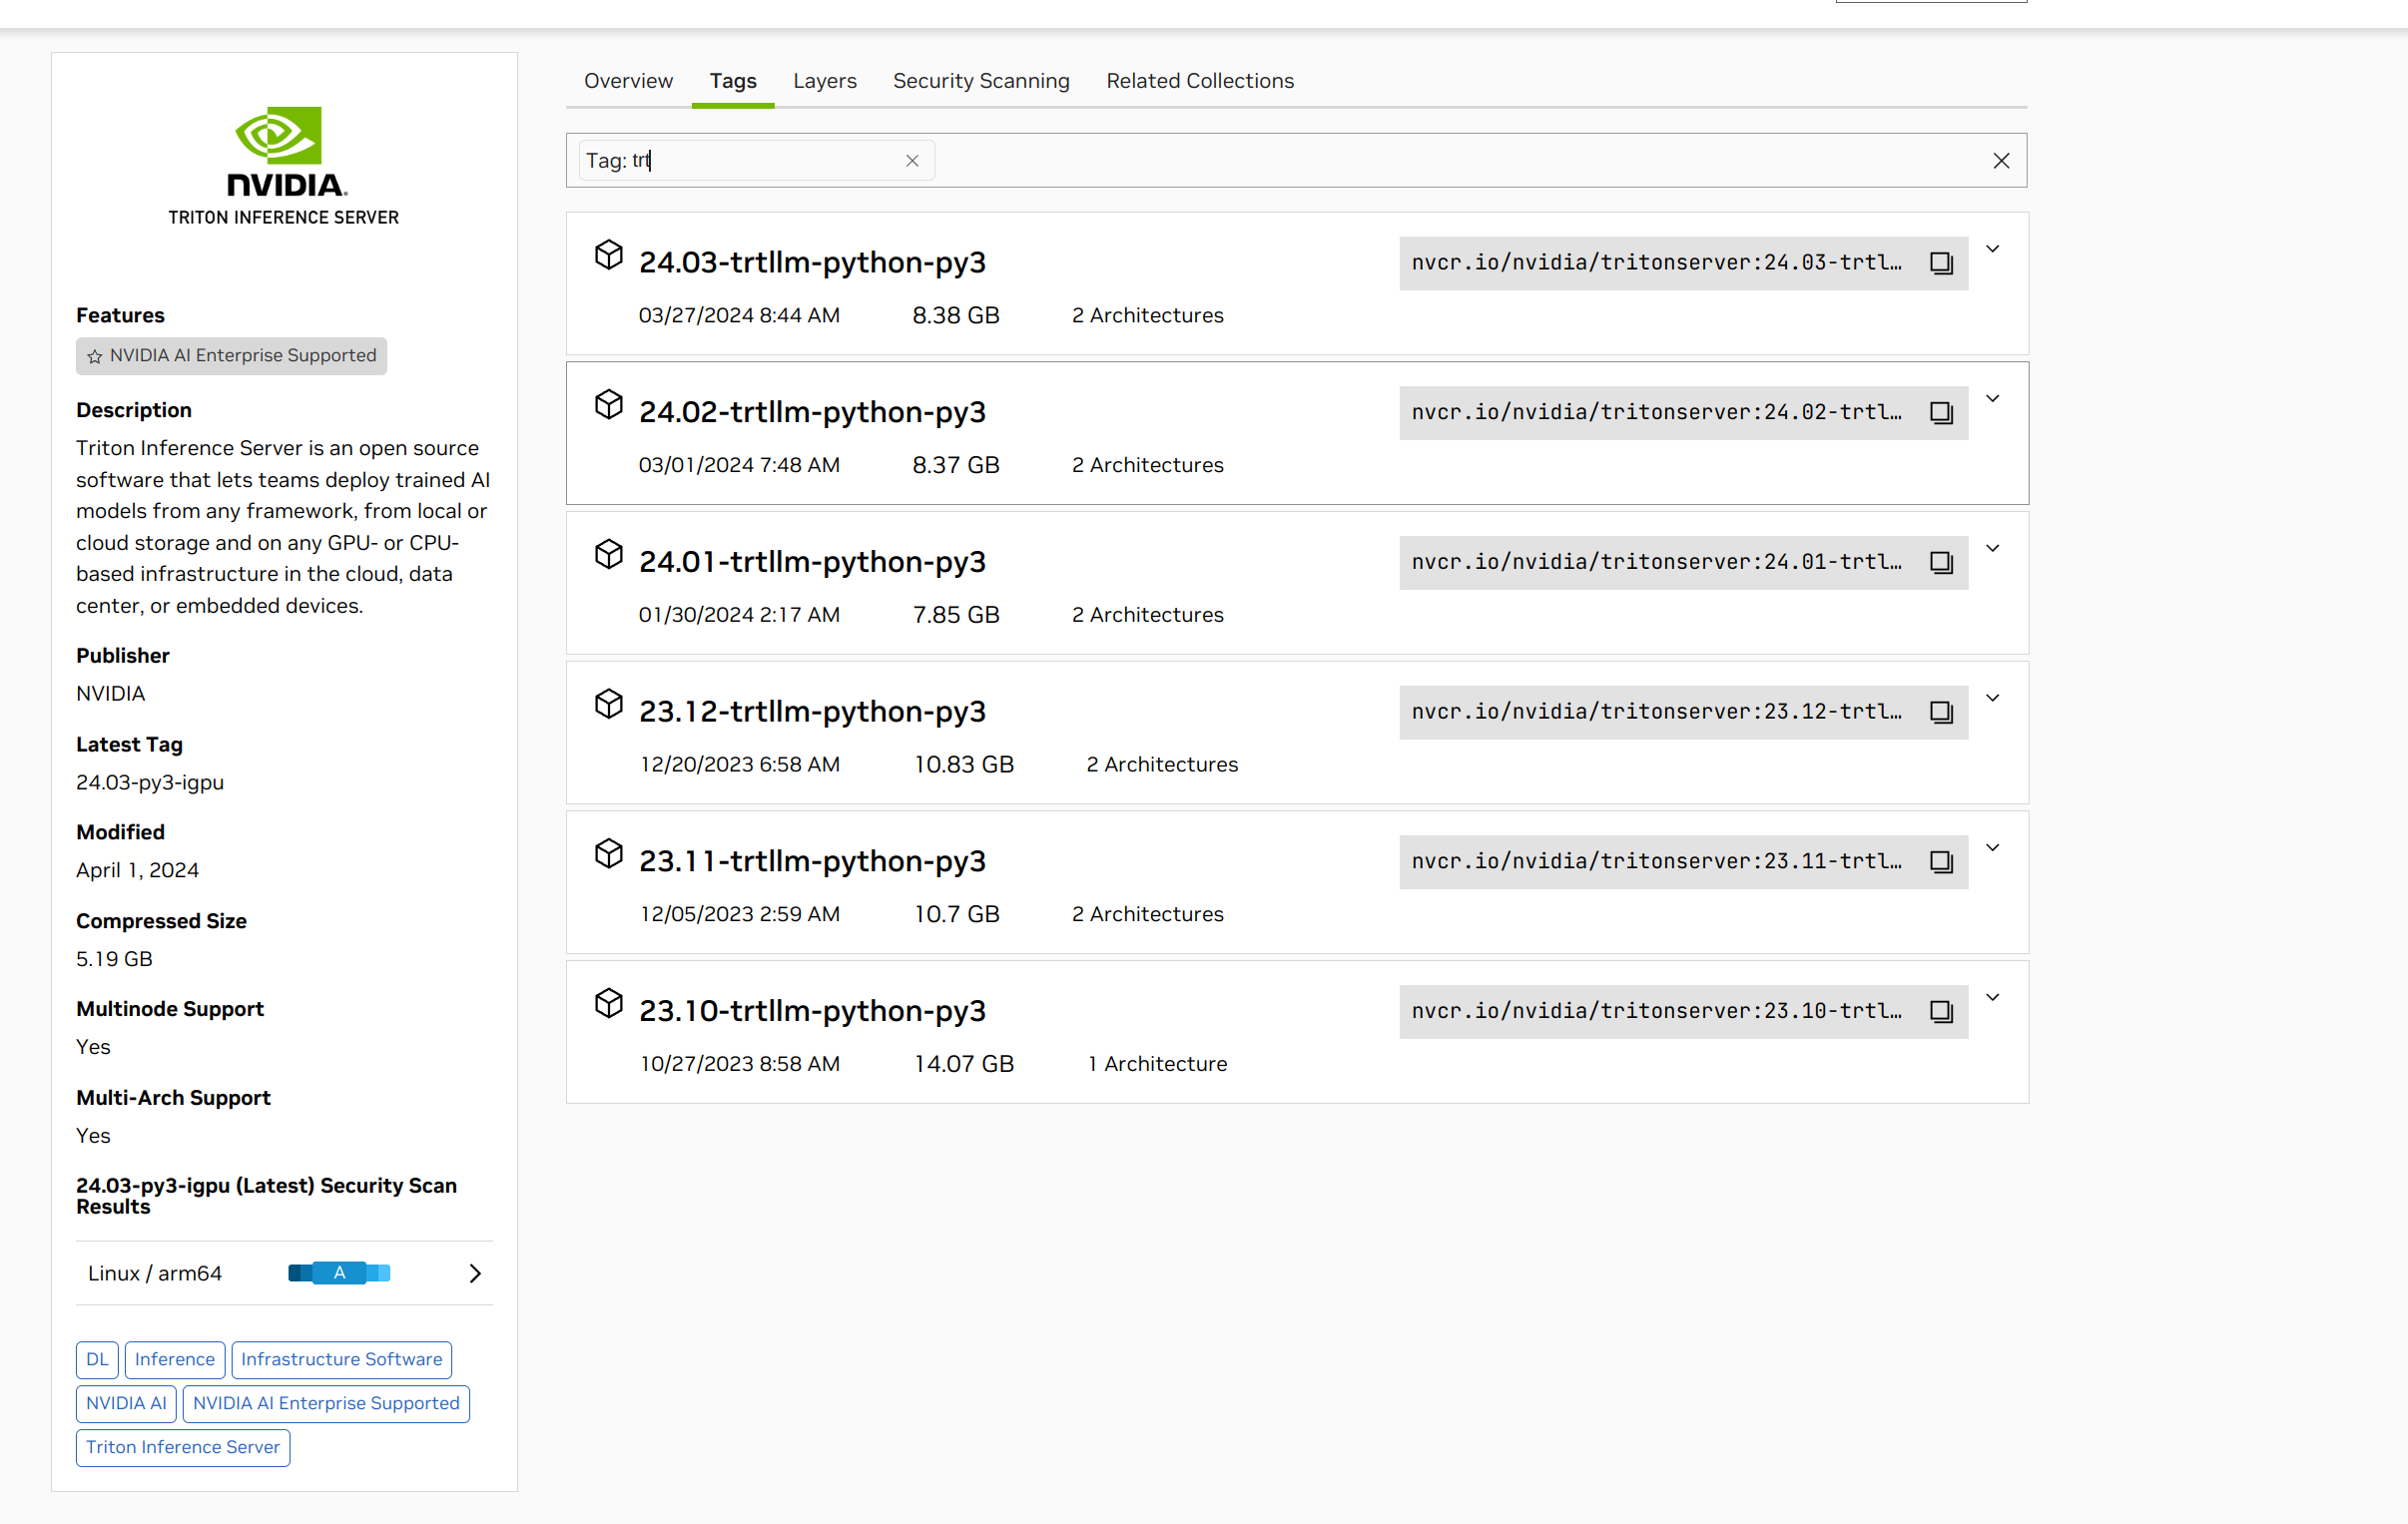
1 docker pull nvcr.io/nvidia/tritonserver:24.03-trtllm-python-py3
2.2 拉取TensorRT-LLM的项目
1
2
git clone https://github.com/NVIDIA/TensorRT-LLM.git -b v0.8.0
拉取tensorrtllm_backend。这个是用来编排tensorrt-llm服务的,需要和TensorRT-LLM版本一致,这里同样选择0.8.0
1 git clone https://github.com/triton-inference-server/tensorrtllm_backend.git -b v0.8.0
2.3 启动容器
1
2
3
4
5
6
7
8
9
10
docker run -d \
2.4 检查环境
进入容器
1 docker exec -it triton /bin/bash
检查英伟达驱动
如果出现 Failed to initialize NVML: Unknown Error
错误,退出docker,修改配置
1
2
sudo vim /etc/nvidia-container-runtime/config.toml //修改no-cgroups为 no-cgroups = false,保存
重新启动triton容器,再次检查英伟达驱动
2.5
直接通过pip安装TensorRT-LLM
1
2
pip config set global.index-url https://pypi.tuna.tsinghua.edu.cn/simple //更换为清华源,下载更快
三、编译Engine
3.1 安装python依赖
1
2
3
docker exec -it triton /bin/bash
1 pip install "transformers>=4.37"
3.3 从HuggingFace下载模型
例如QWen1.5-7B-Chat模型,然后将文件夹重命名为qwen1.5_7b_chat,最后放到examples/qwen2/路径下即可,以下文件全部下载:
3.4 修改编译参数(可选)
默认编译参数,包括batch_size,
max_input_len, max_new_tokens,
seq_length都存放在default_config.py中
默认模型路径,包括hf_model_dir(模型路径)和tokenizer_dir(分词器路径)以及int4_gptq_model_dir(手动gptq量化输出路径),可以改成你自定义的路径。
对于24G显存用户,直接编译即可,默认是fp16数据类型,max_batch_size=2
对于低显存用户,可以降低max_batch_size=1,或者继续降低max_input_len,
max_new_tokens
3.5 编译运行fp16模型
3.5.1 编译fp16
注:--remove_input_padding和--enable_context_fmha为可选参数,可以一定程度上节省显存。其他更多版本请参考
1 python3 build.py --remove_input_padding --enable_context_fmha --gpt_attention_plugin float16 --paged_kv_cache --gemm_plugin float16
3.5.2 运行
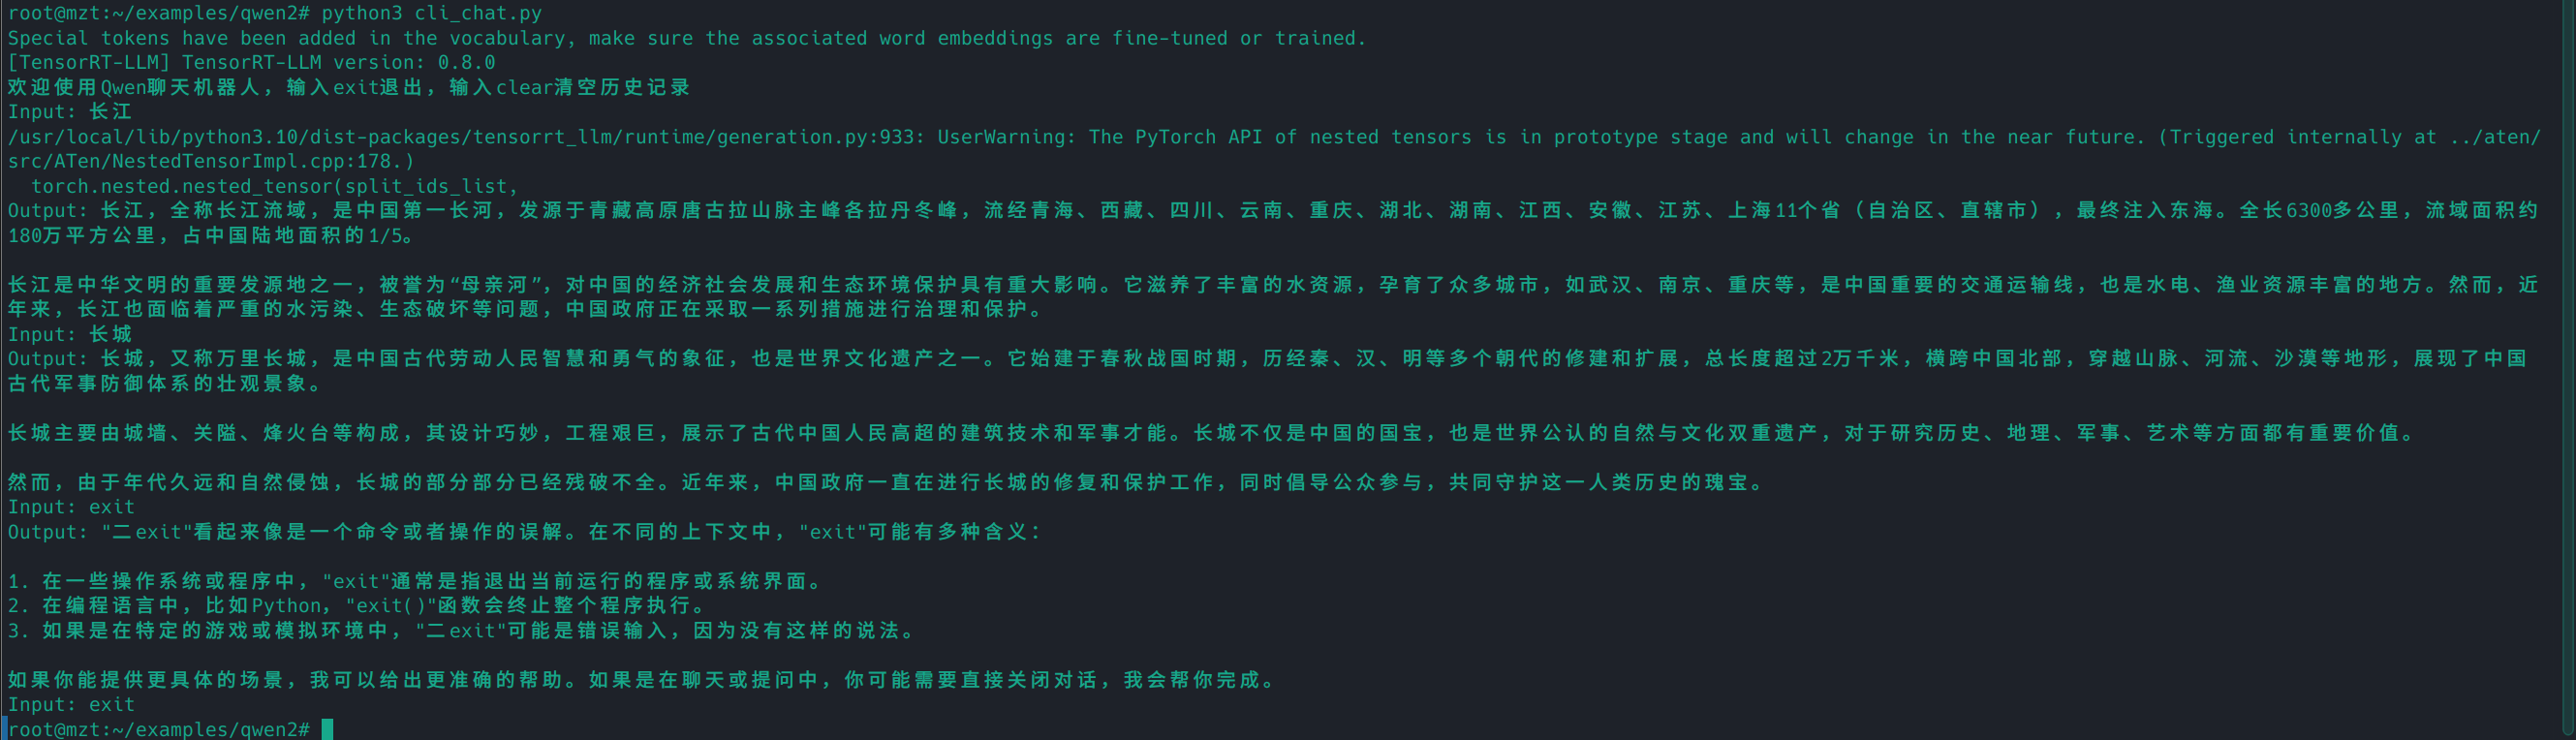
编译完后,再试跑一下,输出Output:
“您好,我是来自达摩院的大规模语言模型,我叫通义千问。<|im_end|>”这说明成功。单GPU使用python直接运行run.py
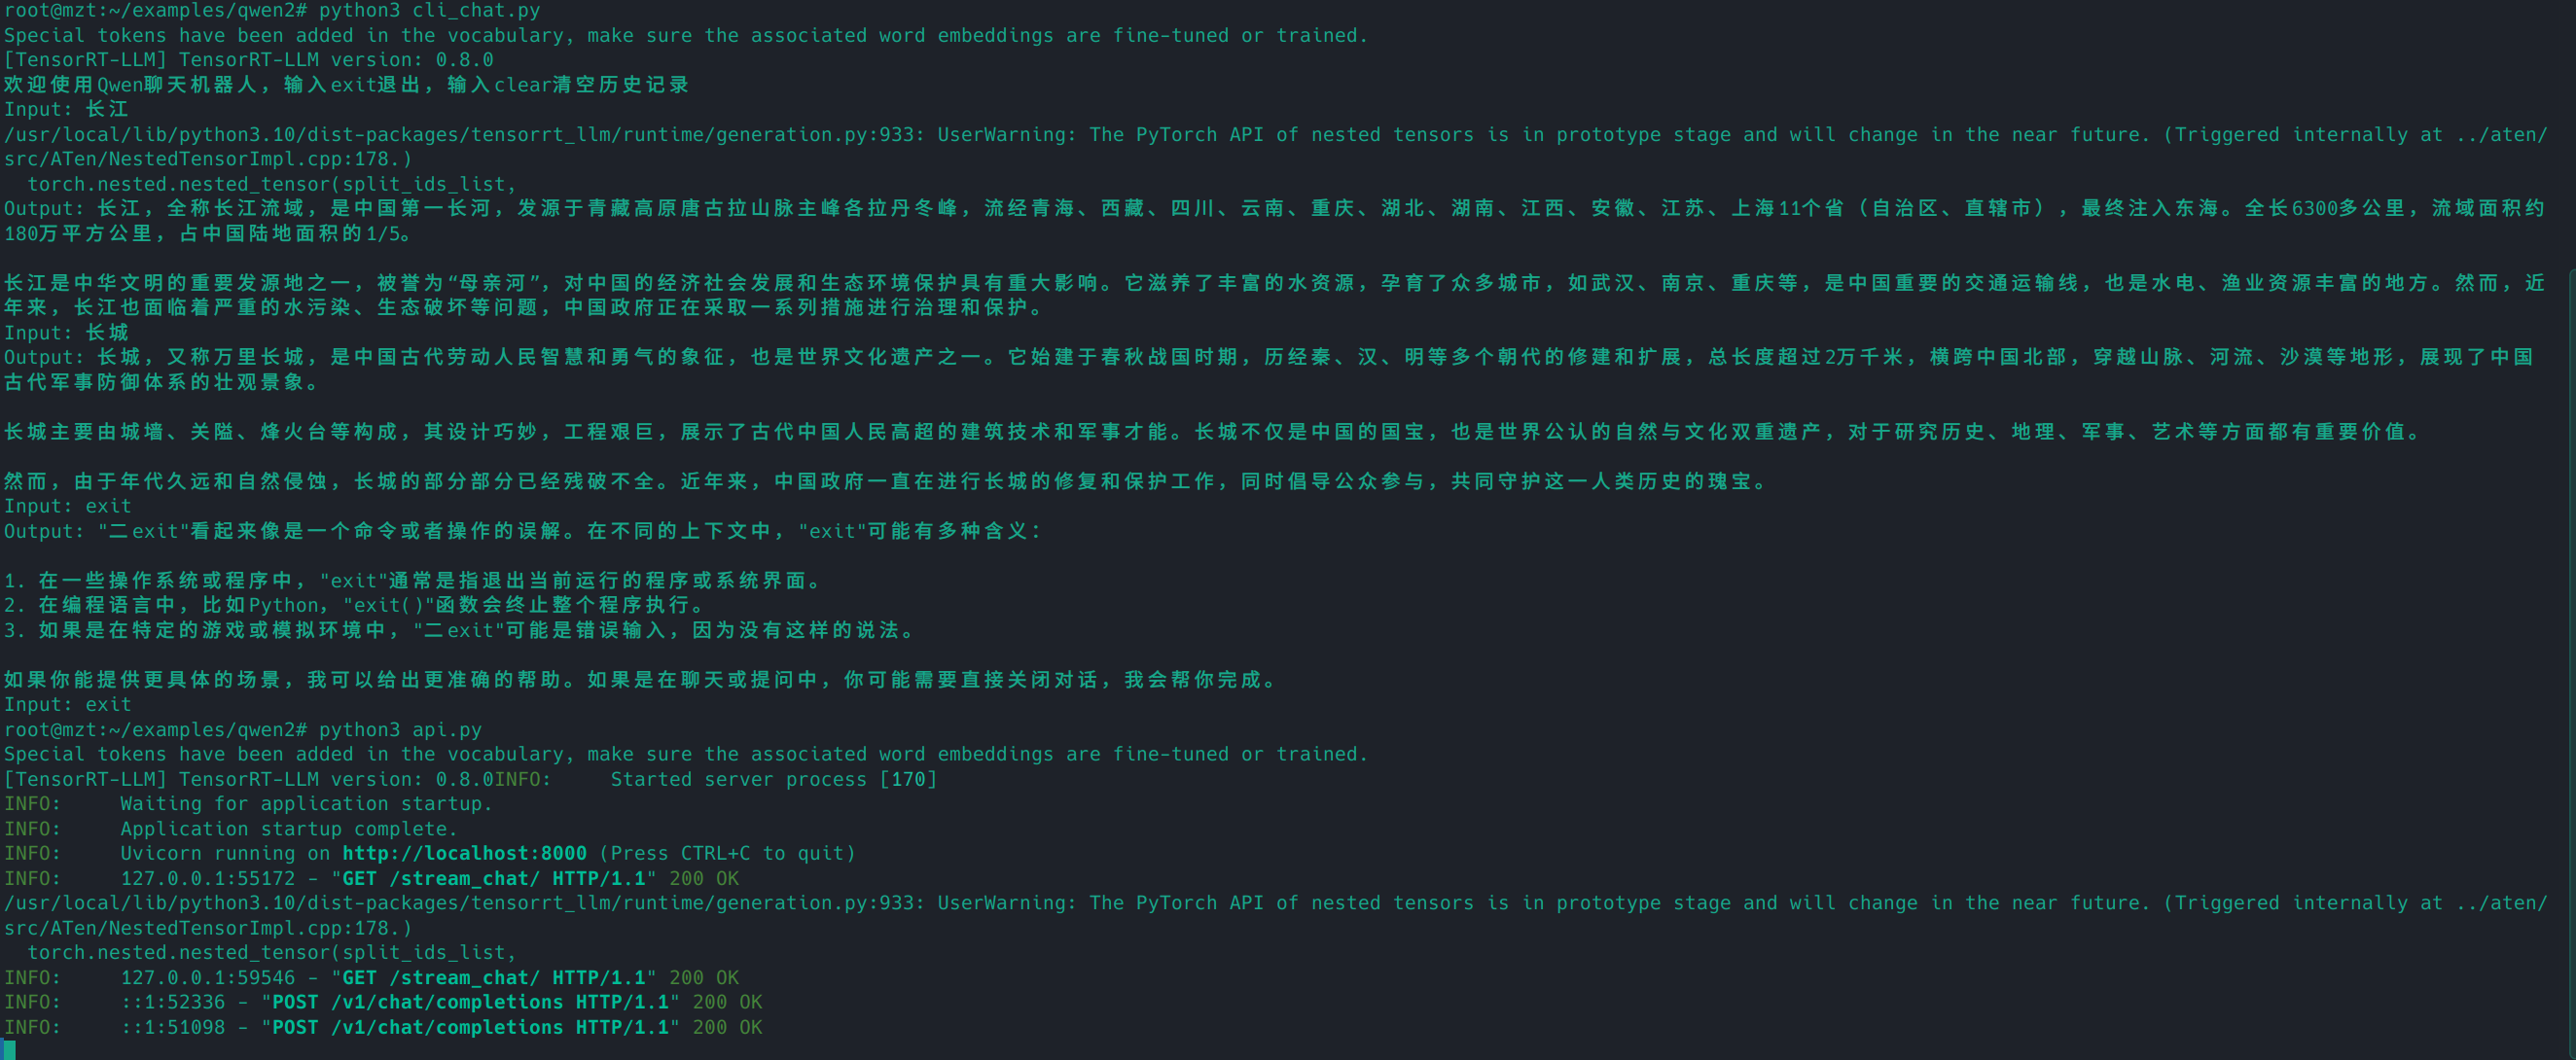
3.5.3 对话
尝试终端对话。运行下面的命令,然后输入你的问题,直接回车即可。
如图
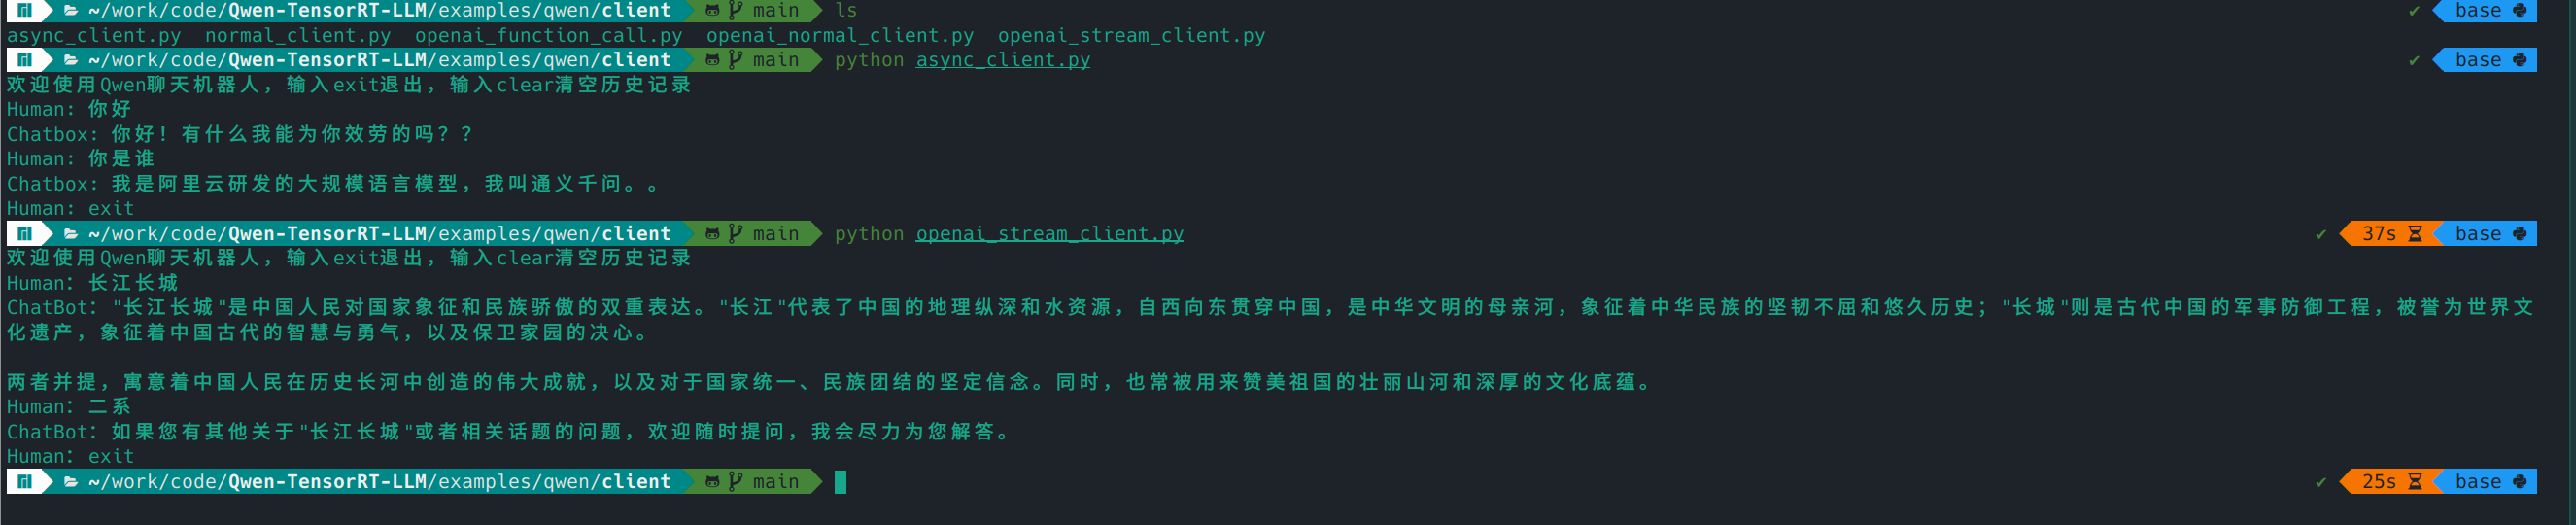
另开一个终端,进入qwen/client目录,里面有4个文件,分别代表不同的调用方式。
async_client.py,通过异步的方式调用api,通过SSE协议来支持流式输出。
normal_client.py,通过同步的方式调用api,为常规的HTTP协议,Post请求,不支持流式输出,请求一次需要等模型生成完所有文字后,才能返回。
openai_normal_client.py,通过openai模块直接调用自己部署的api,该示例为非流式调用,请求一次需要等模型生成完所有文字后,才能返回。
openai_stream_client.py,通过openai模块直接调用自己部署的api,该示例为流式调用。
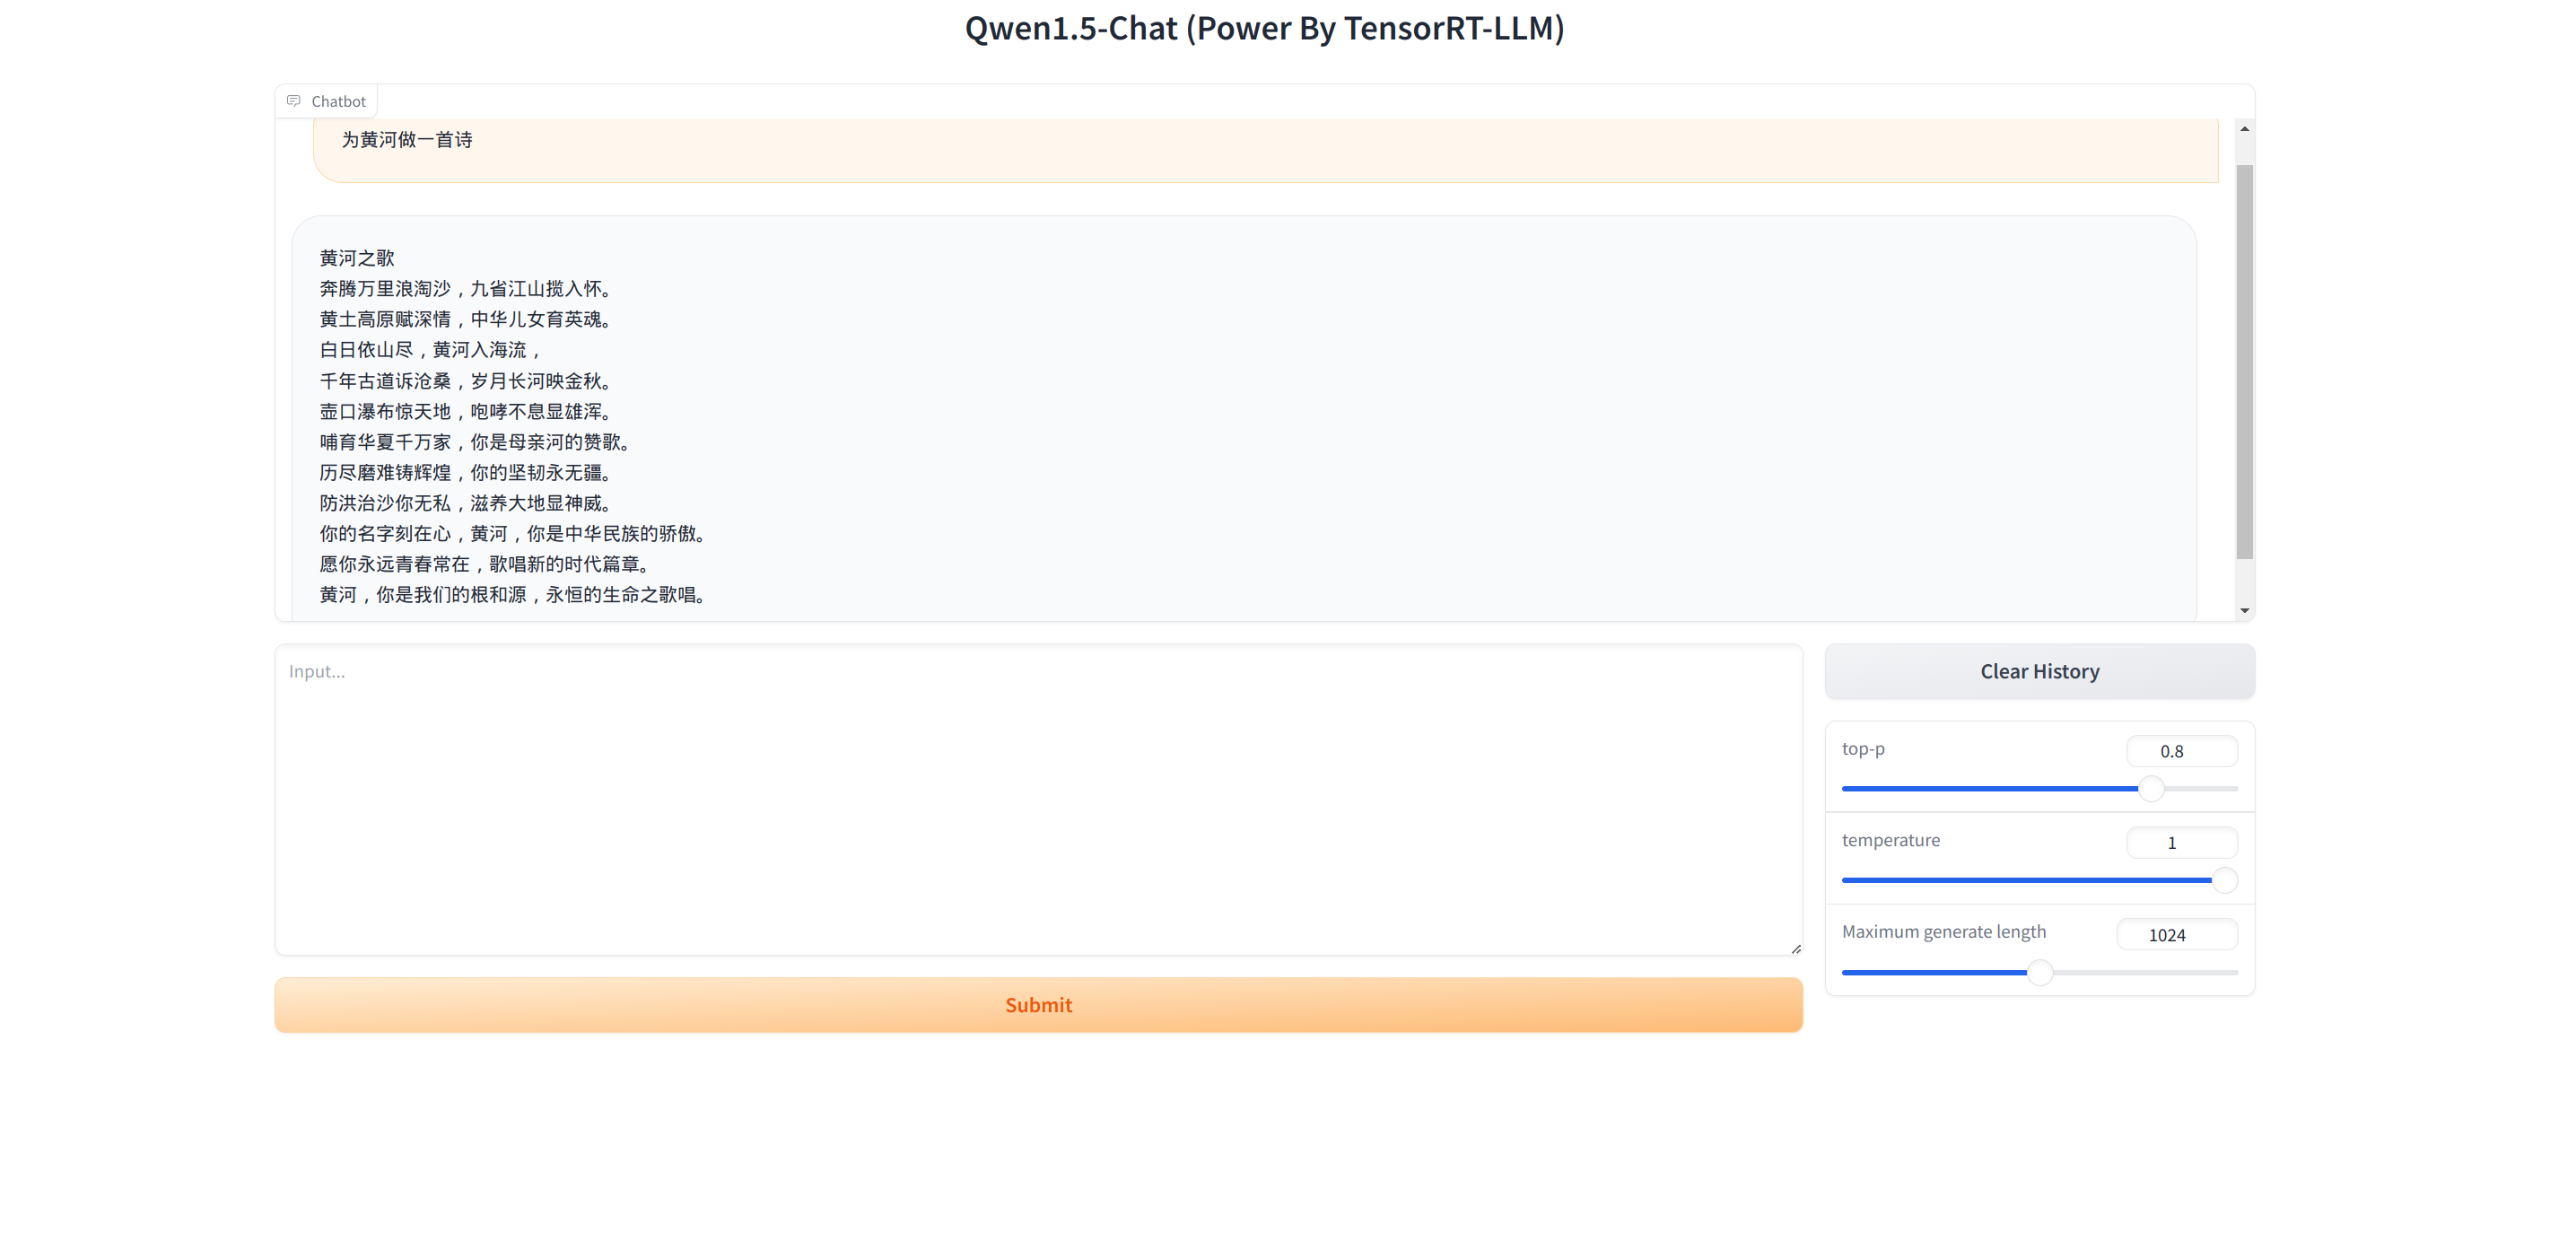
网页对话(需要先部署api)。运行下面的命令,然后打开本地浏览器,访问:http://127.0.0.1:7860
即可
1
2
python3 api.py
四、部署Triton
4.1 进入容器
1 docker exec -it triton /bin/bash
4.2 构建好目录
1
2
cd /tensorrtllm_backend
4.3
复制上一部分编译好的Engine文件
1
2
cd /root/examples/qwen2/trt_engines/fp16/1-gpu/
4.4 复制tokenzer文件
1
2
cd /root/examples/qwen2
4.5
删除tokenizer目录的Huggingface模型文件(可选)
1 rm /tensorrtllm_backend/triton_model_repo/tensorrt_llm/qwen1.5_7b_chat/*.safetensors
4.6
编写Triton中的预处理配置和后处理配置
1
2
3
4
5
6
7
8
9
10
11
12
13
14
15
16
17
18
19
cd /tensorrtllm_backend# 根据cpu线程数定,一般为batch_size的2倍数或者cpu线程的一半 # 我就一张卡,你可以指定用那些卡,用逗号隔开
4.7 代码修改
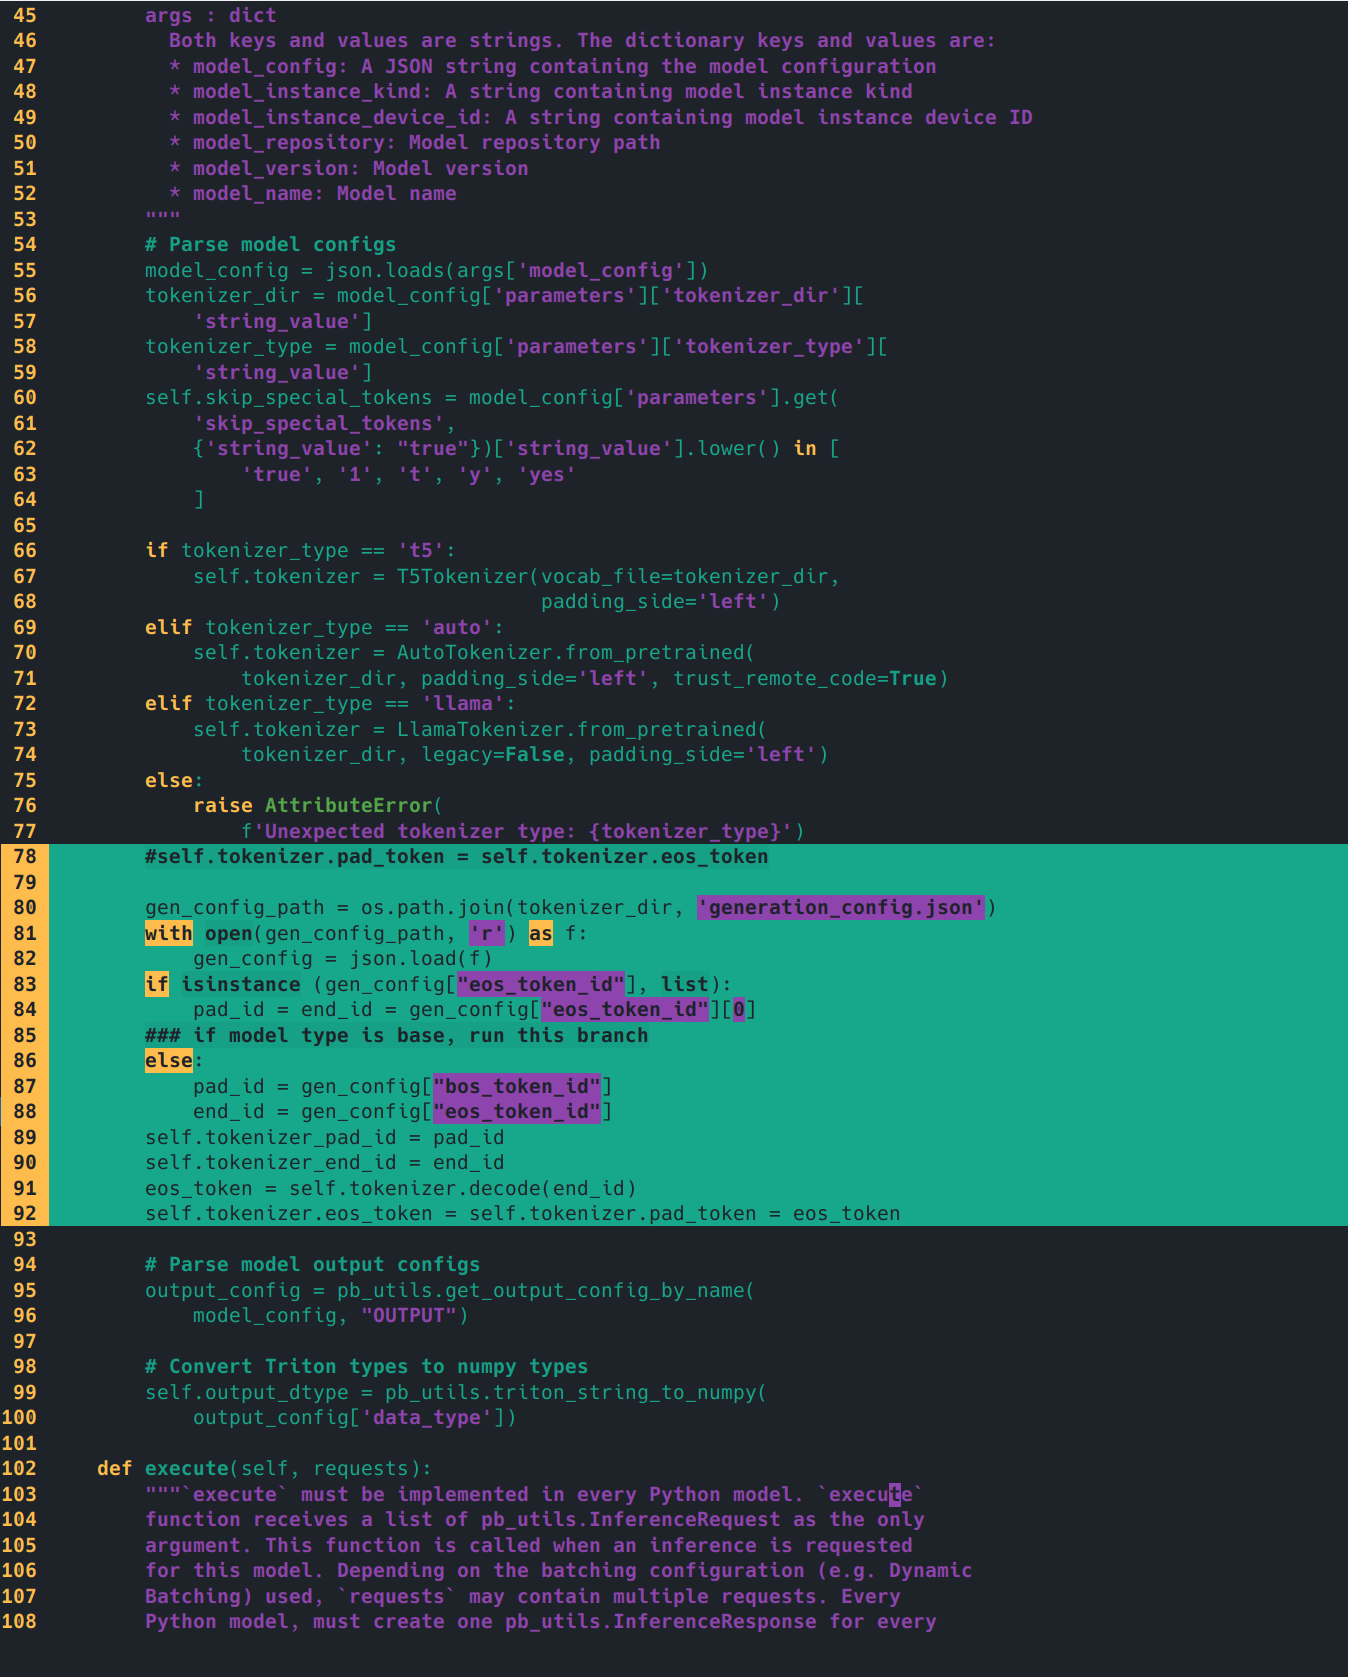
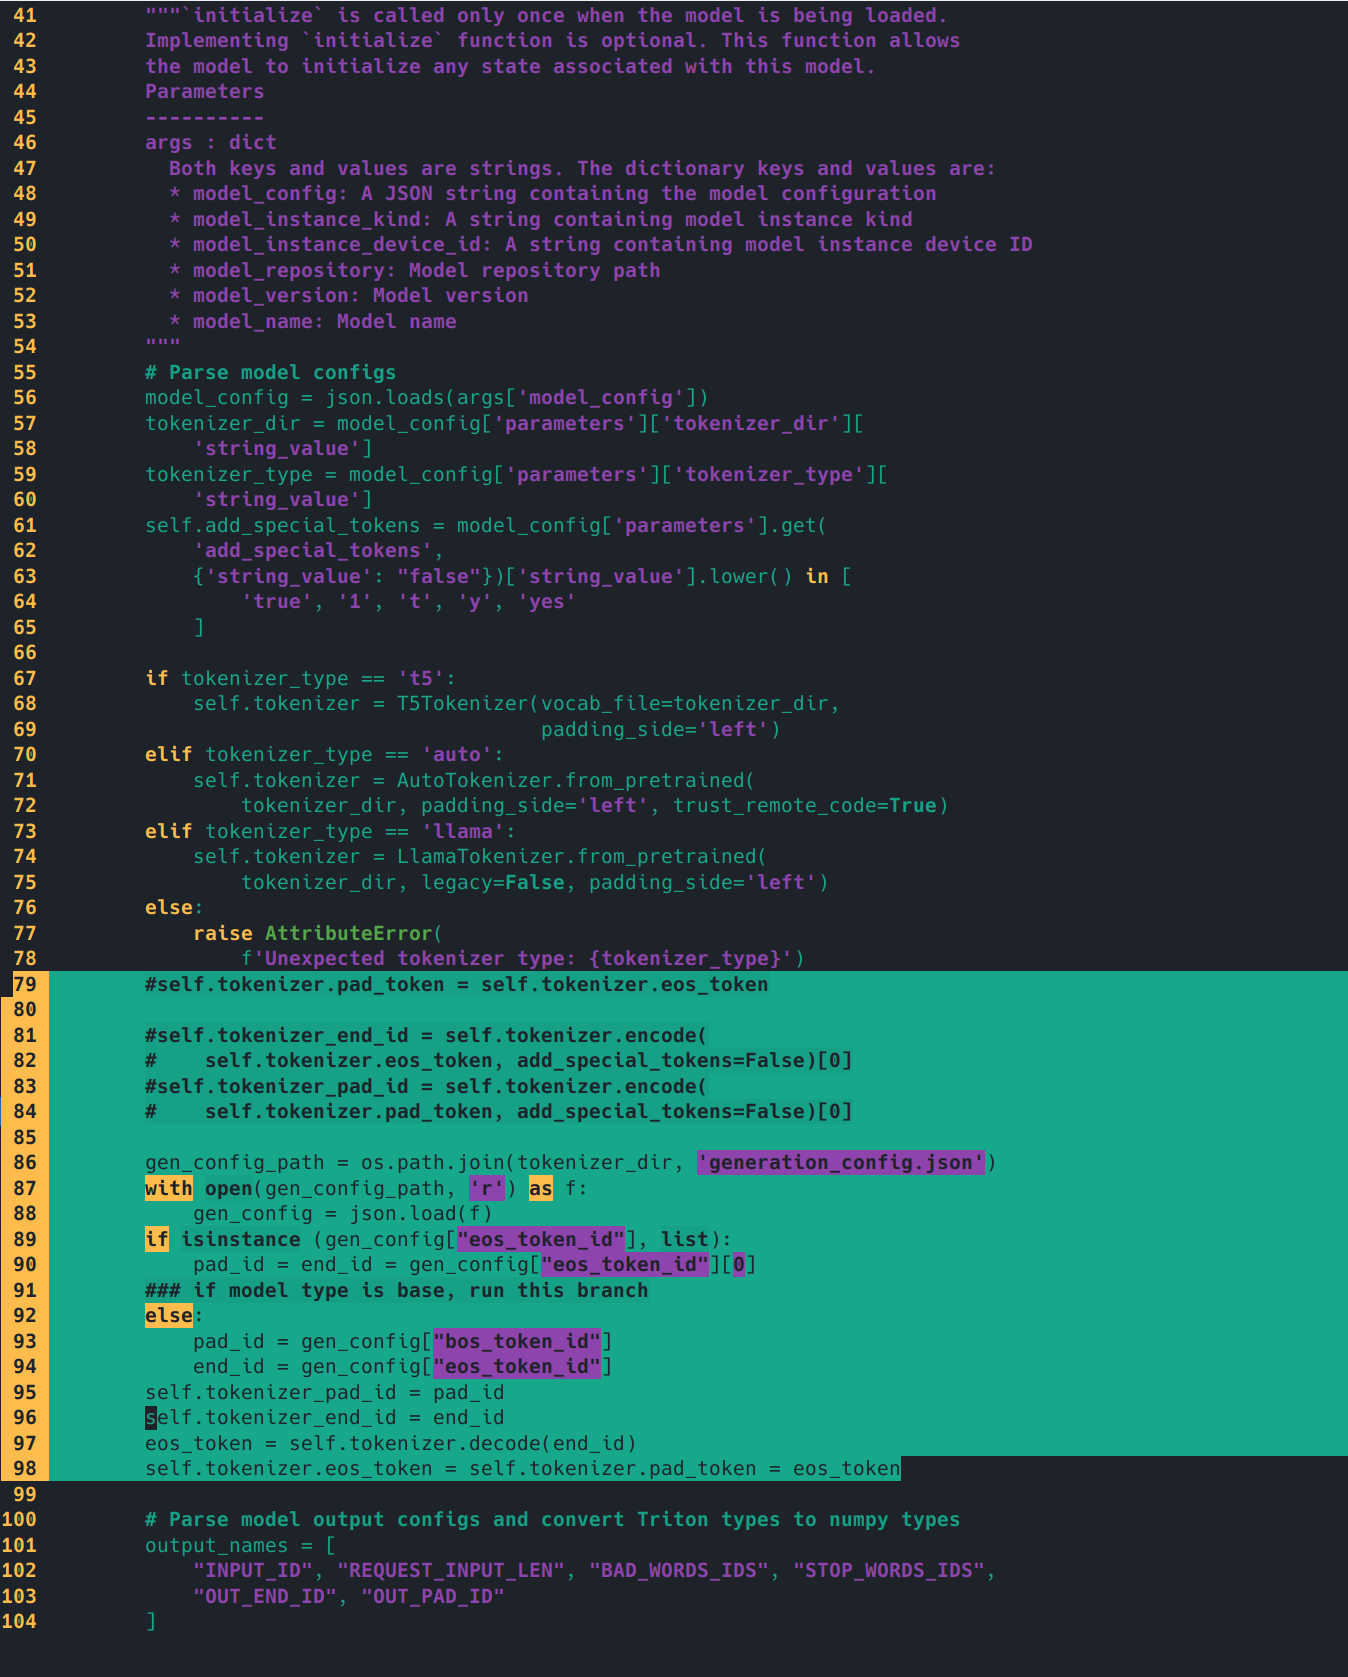
简单修改一下preprocess/postprocess的model.py的initialize函数,示例是llama的,我们要改成qwen的tokenizer配置。
修改前(/tensorrtllm_backend/triton_model_repo/preprocessing/1/model.py有三行,/tensorrtllm_backend/triton_model_repo/postprocessing/1/model.py只有一行):
1
2
3
4
5
self .tokenizer.pad_token = self .tokenizer.eos_tokenself .tokenizer_end_id = self .tokenizer.encode(self .tokenizer.eos_token, add_special_tokens=False )[0 ]self .tokenizer_pad_id = self .tokenizer.encode(self .tokenizer.pad_token, add_special_tokens=False )[0 ]
修改后
1
2
3
4
5
6
7
8
9
10
11
12
13
14
15
16
import os'generation_config.json' )with open (gen_config_path, 'r' ) as f:if isinstance (gen_config["eos_token_id" ], list ):"eos_token_id" ][0 ]else :"bos_token_id" ]"eos_token_id" ]self .tokenizer_pad_id = pad_idself .tokenizer_end_id = end_idself .tokenizer.decode(end_id)self .tokenizer.eos_token = self .tokenizer.pad_token = eos_token
4.8 启动服务
1
2
cd /tensorrtllm_backend
ERROR: Failed to create instance: unexpected error when creating modelInstanceState: TrtGptModelInflightBatching requires GPT attention plugin with packed input and paged KV cache.
tensorrt_llm/config.pbtxt里面的gpt_model_type对应的value为inflight_batching报错,需要编译的Engine开启了paged_kv_cache,http流式调用
tensorrt_llm/config.pbtxt里面的gpt_model_type value为v1可解决上述错误
4.9
另外开一个终端,测试一下http效果。
请求
1
2
curl -X POST localhost:8000/v2/models/ensemble/generate \
输出结果
1 { "cum_log_probs" : 0.0 , "model_name" : "ensemble" , "model_version" : "1" , "output_log_probs" : [ 0.0 , 0.0 , 0.0 , 0.0 , 0.0 , 0.0 , 0.0 , 0.0 , 0.0 , 0.0 , 0.0 , 0.0 , 0.0 , 0.0 , 0.0 , 0.0 , 0.0 , 0.0 ] , "sequence_end" : false , "sequence_id" : 0 , "sequence_start" : false , "text_output" : "你好,我是来自阿里云的大规模语言模型,我叫通义千问。" }
五、调用服务
5.1 python客户端请求
5.1.1 安装python依赖(可选)
1 pip install tritonclient transformers gevent geventhttpclient tiktoken grpcio
5.1.2 客户端请求
运行qwen/triton_client/inflight_batcher_llm_client.py文件即可开启
1
2
cd /root/examples/triton_client
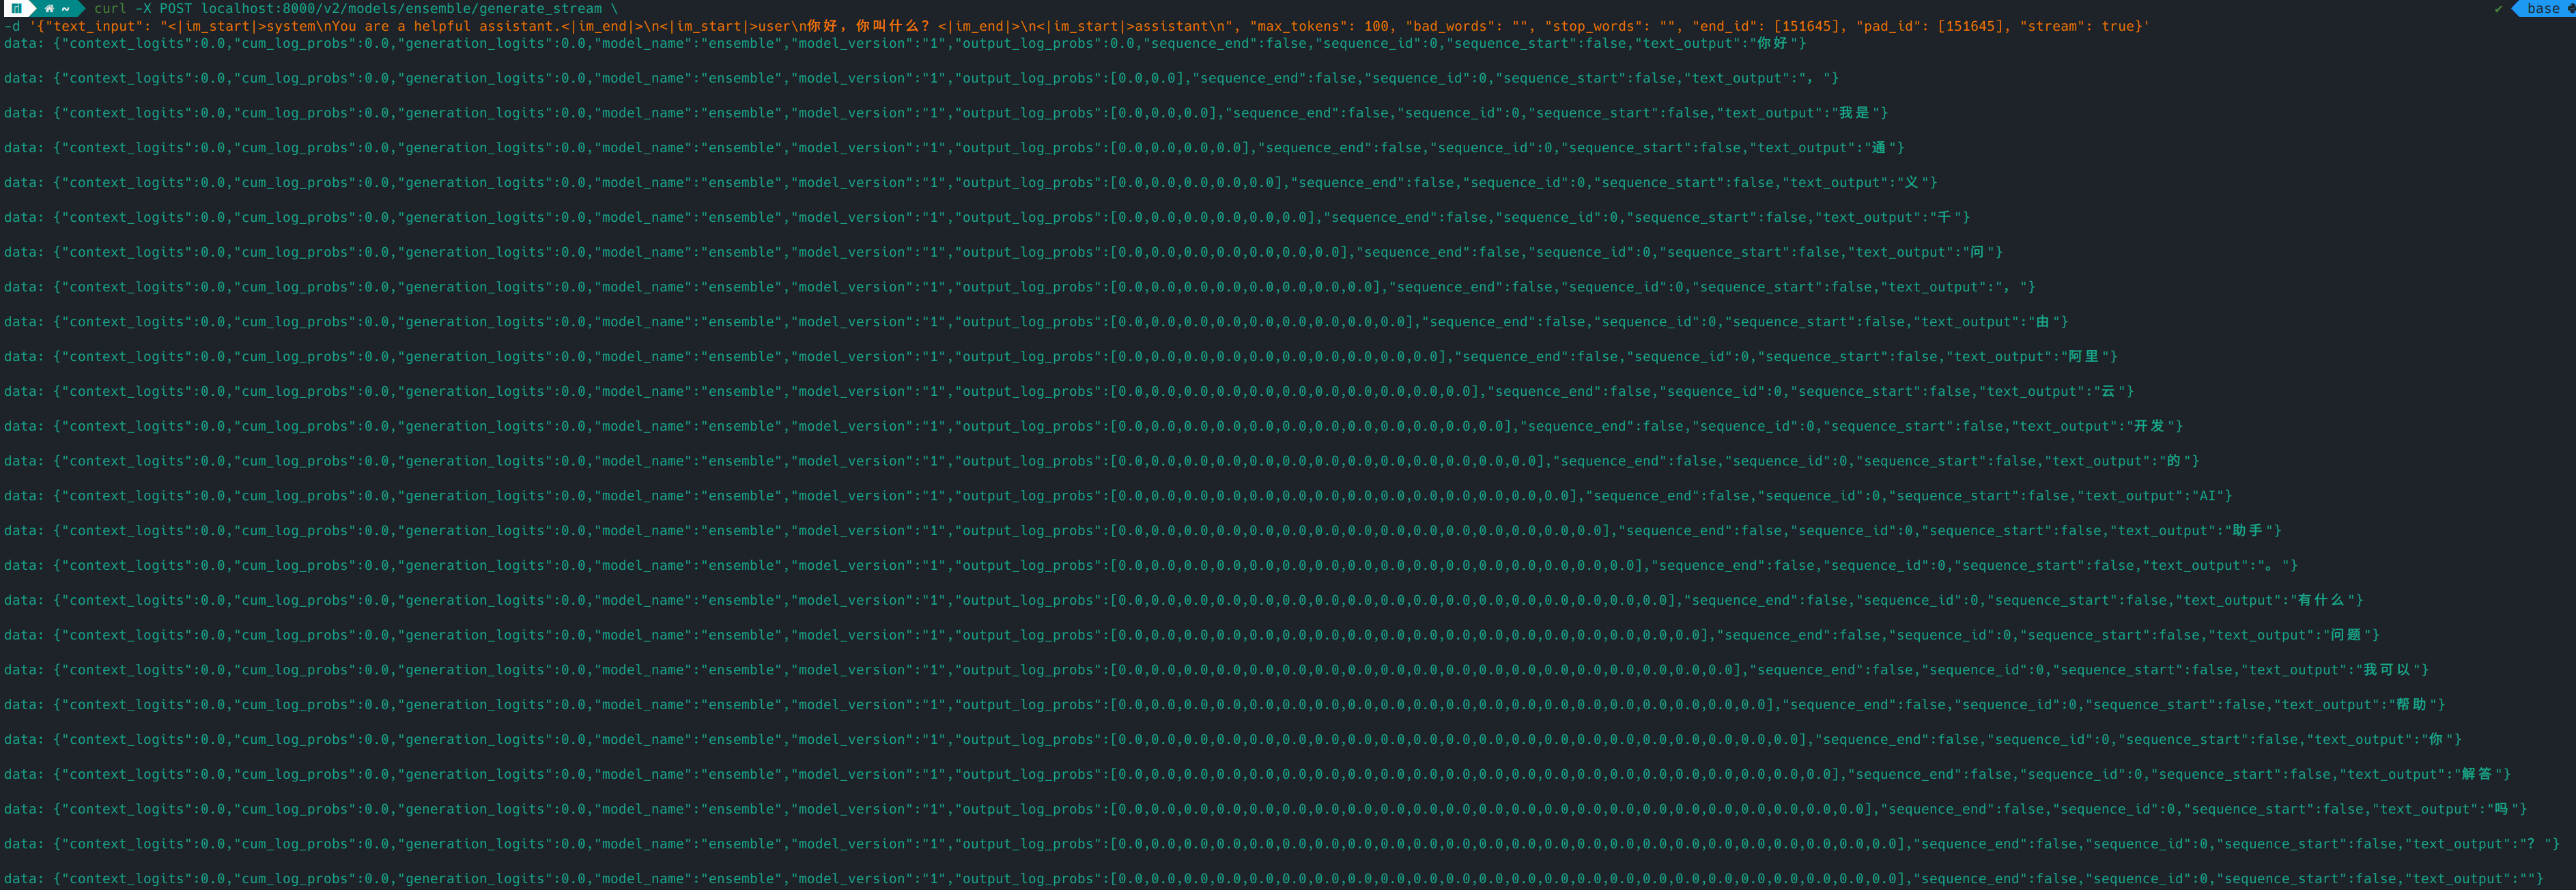
5.2 http流式调用
5.2.1 前提
编译的Engine开启了paged_kv_cache
部署triton时,tensorrt_llm/config.pbtxt里面的gpt_model_type对应的value为inflight_batching
5.2.2 运行命令
1
2
curl -X POST localhost:8000/v2/models/ensemble/generate_stream \
5.2.3 输出结果:
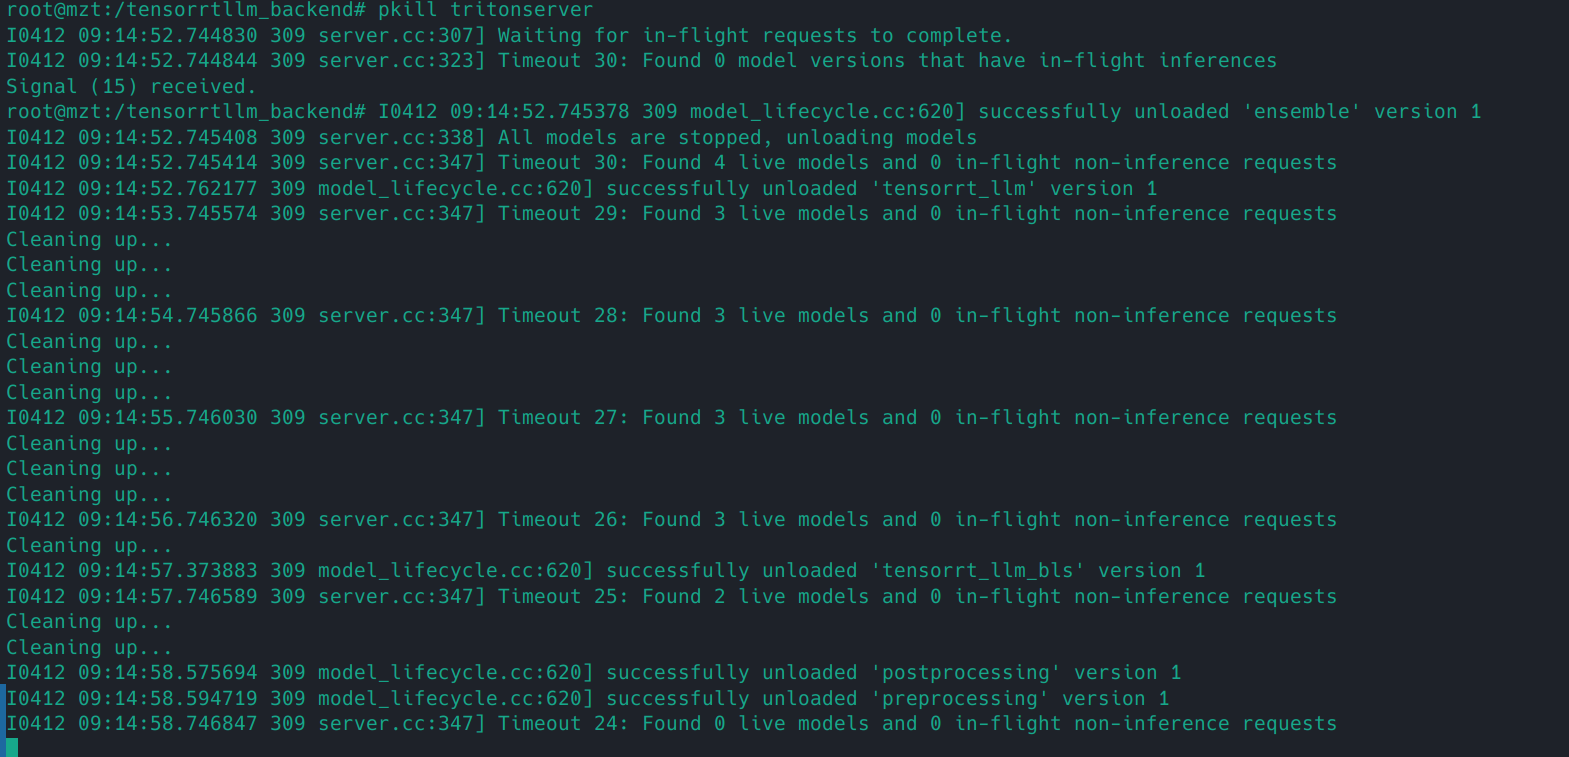
5.2.4 关闭triton服务